
I have a good set of tools, but not a lot of experience, so I looked for construction directions online. After some searching, I settled on my friend Ben’s design, with two modifications.

My wall would be inside, and would only have the angled walls, because I only had an 8 foot wide space. Ben gave me some great advice:
- Plan for a kick plate at the bottom (yet to be installed).
- Do one wall at 30 degrees.
- Do the second at 45, altering to vertical.
So that’s what we built.
When I built the monkey bars/salmon ladder/peg wall, I got lots of question about how to do it. So, for the benefit of those who would like to build a garage bouldering wall, I’ve built a budget, a bill of materials, and step by step instructions.
First, here’s the equipment I used:
- Table saw
- Circular saw
- Drill
- Stud finder
- Level
- Tape measure
- T-square
- Socket set
- Phillips screwdriver
- 1/2 inch spade drill bit
- socket adapter bit
- wood clamp
- 8 foot step ladder (borrowed from a kind neighbor)
You could probably do all of this with either a table saw or a circular saw, but cutting angles is vastly easier with a circular saw, and for the rest the table saw makes better, straight cuts. And I probably should have used my nail gun to get pieces quickly into place, and then properly affix them with screws – but I didn’t think about it until afterward.
I tried to assemble a generous bill of materials so that I wouldn’t be making repeated trips to the lumber yard and hardware store. I failed. However, I’ve tried to capture it all here (with links) to reduce hassle for others who try something like this. All told, it cost me just under $500 because I had some supplies and tools in hand, and some supplies were cheaper than this budget (e.g. the lag screws).
Here are my baseline assumptions:
- 10.5 foot ceiling
- one 30 degree wall (4 ft wide) adjoining to a 45 degree wall (4 ft wide) that becomes vertical
For those who follow recipes, here’s the garage bouldering wall recipe:
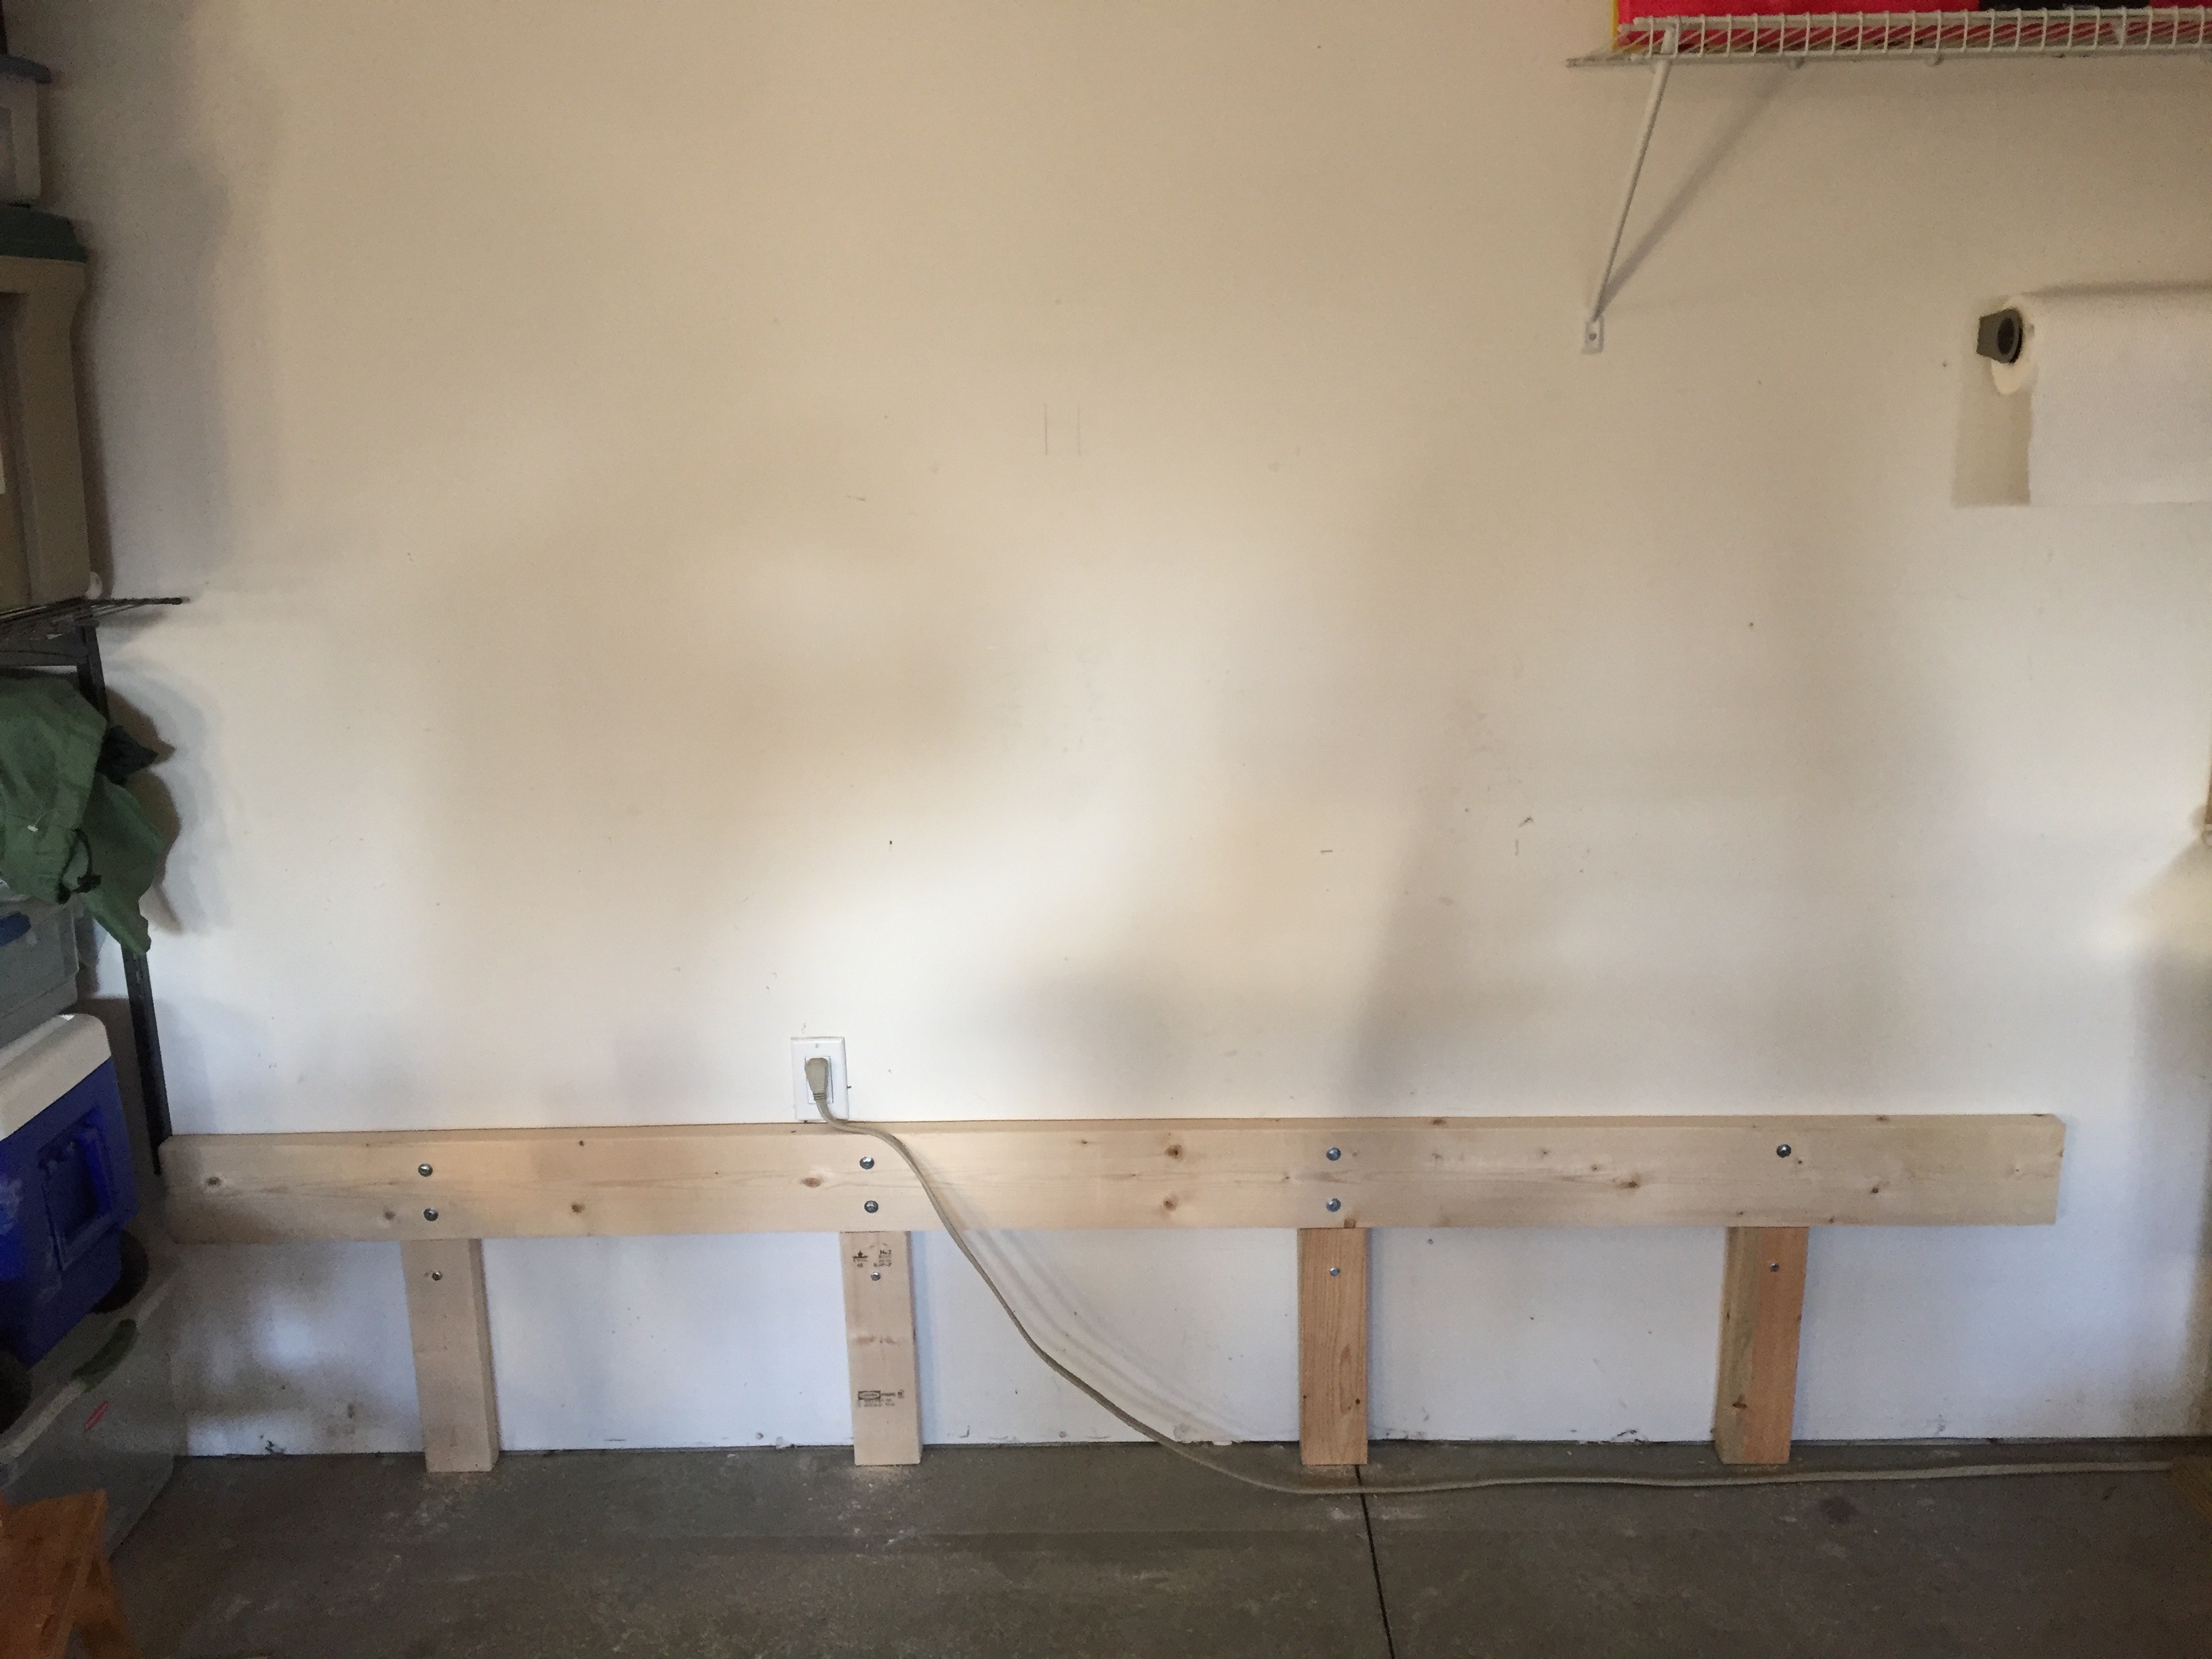
- Secure to the wall.
- I cut four sixteen inch lengths of 2x4s to be “footers.”
- I used my stud finder, and marked the studs to which I would anchor.
- These I attached to the wall using 3.5 inch lag screws and washers (1/4 inch diameter).
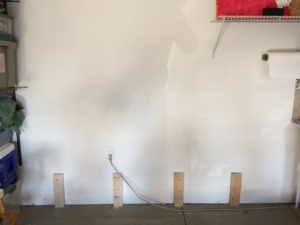
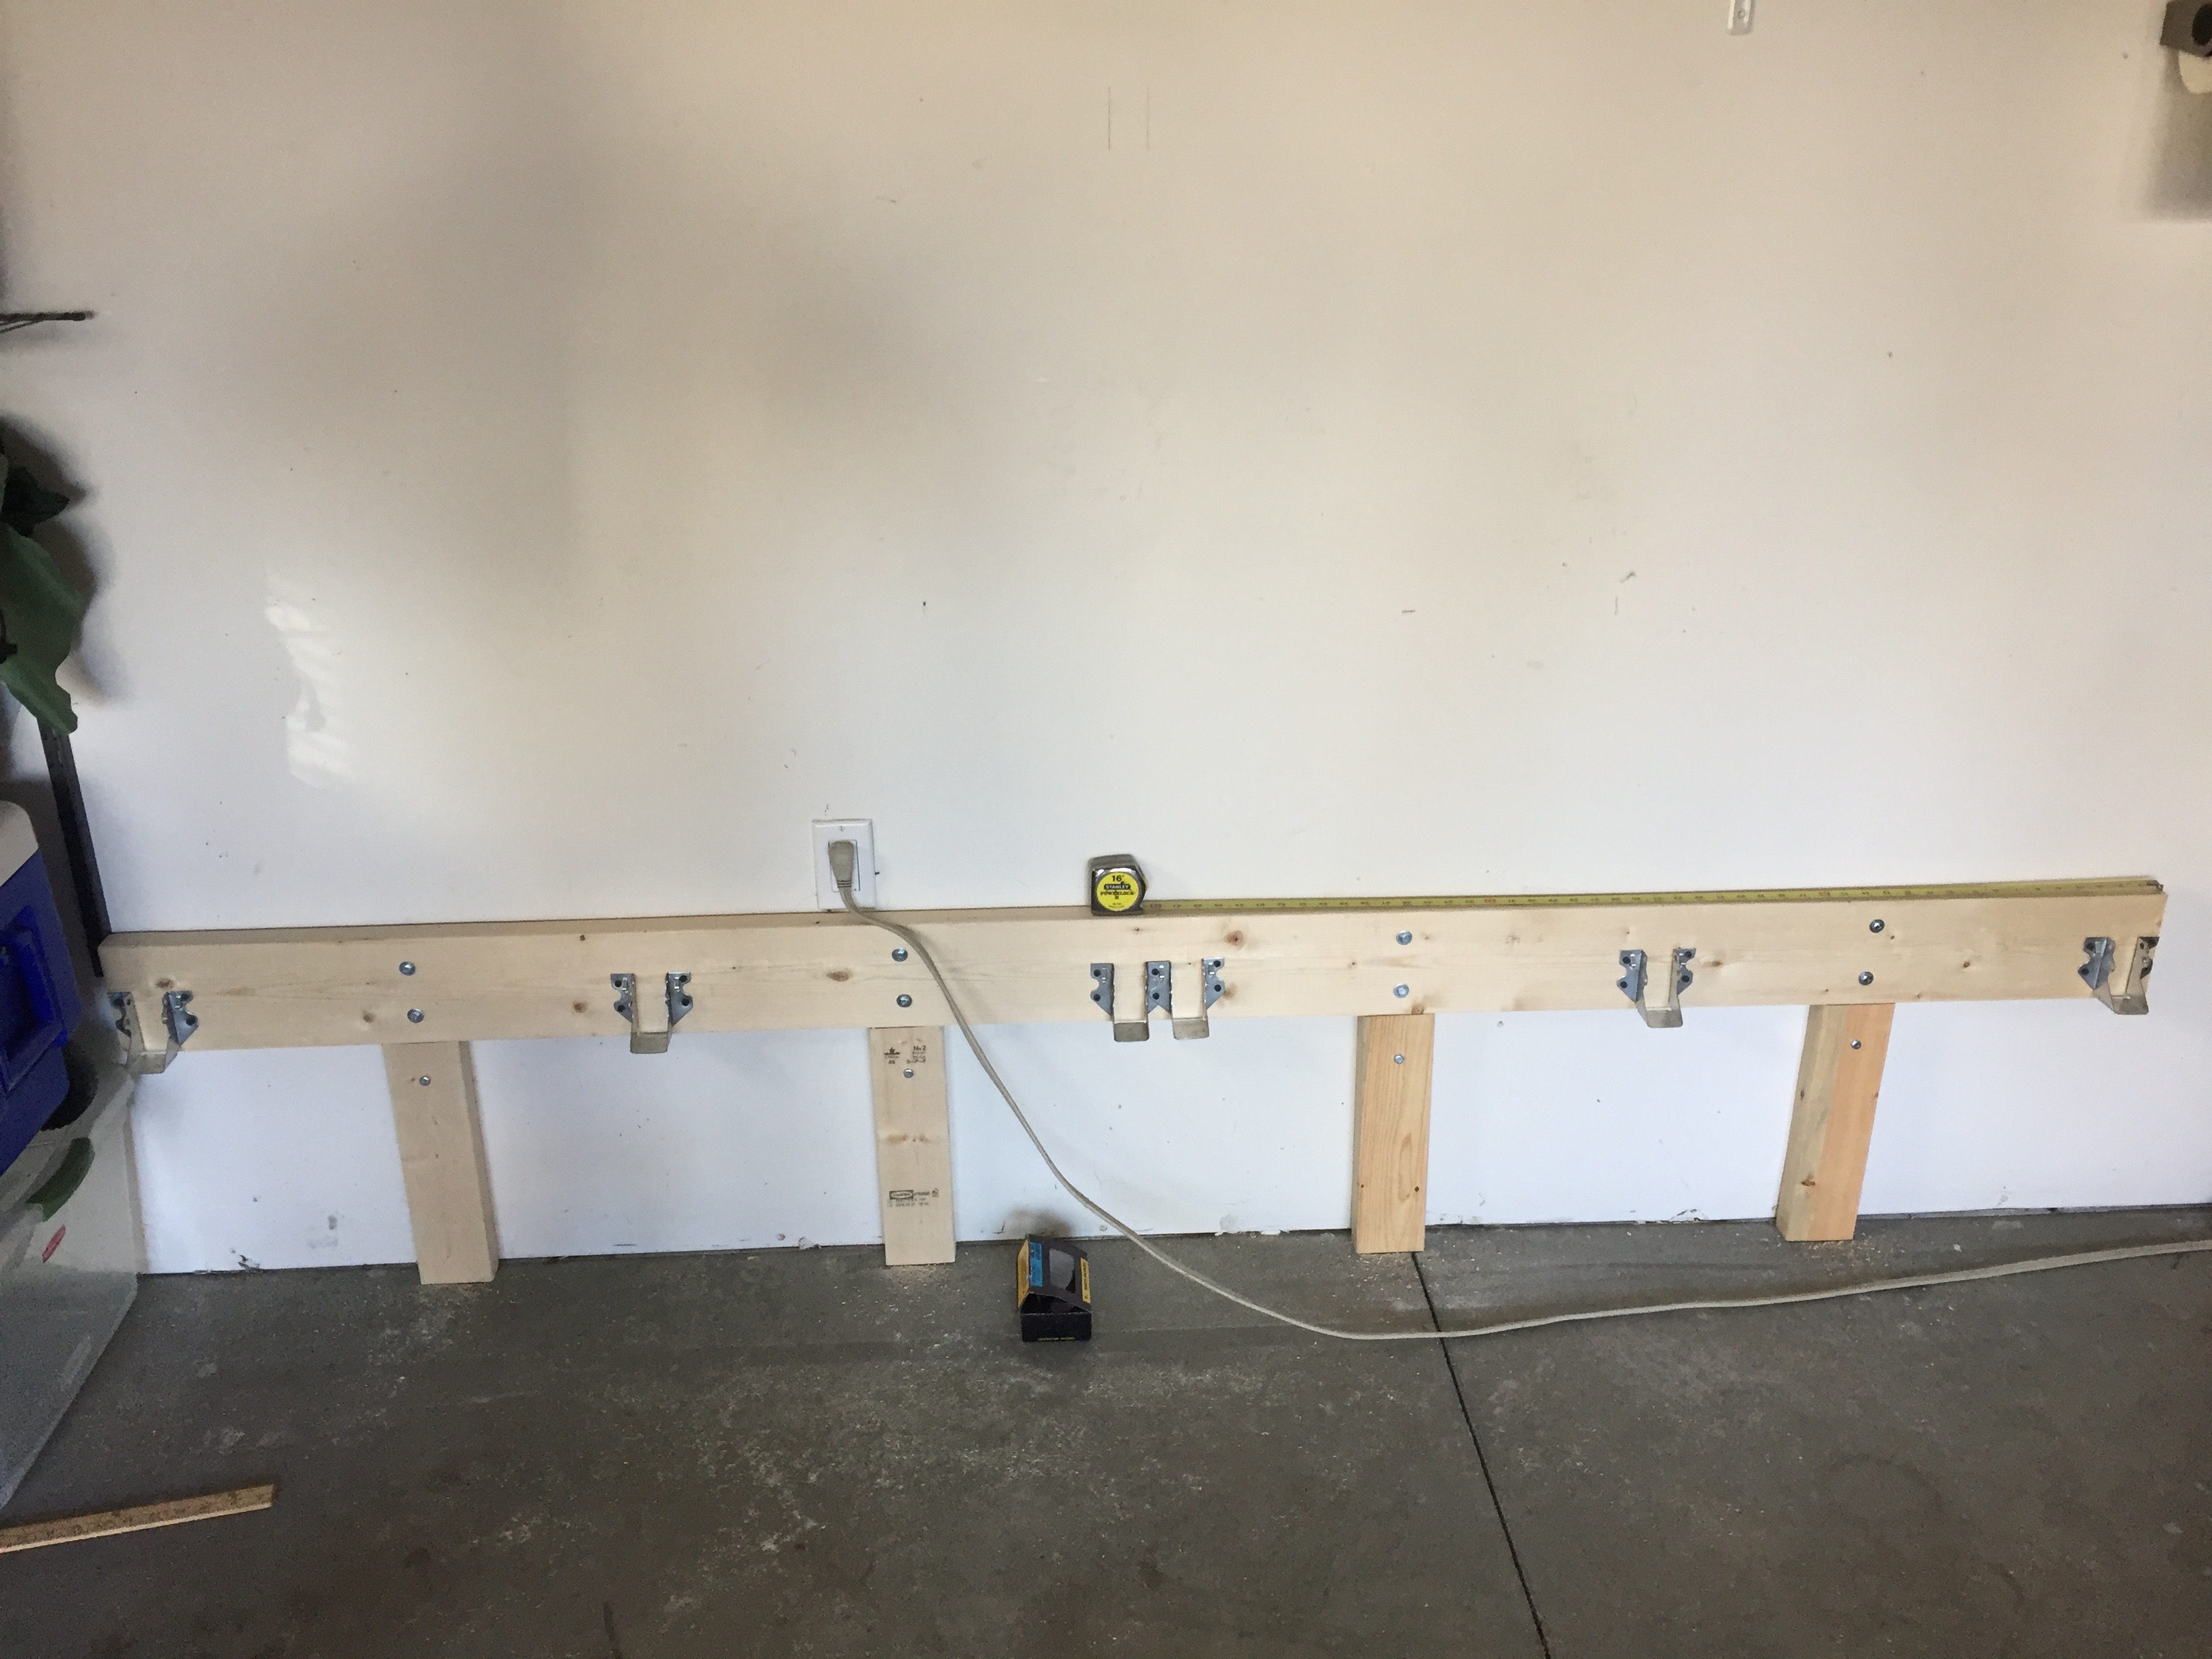
- I then anchored an 8 foot 2×6 to the wall with the same lag screws (and washers) to be the “sleeper” to which I would attach my frame.
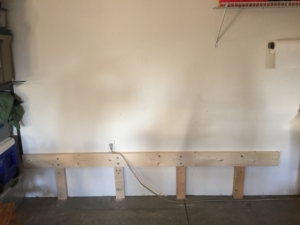
- I chose six joist hangers to attach to the sleeper.

- I positioned one as far to each end as possible, and overlapped the middle two as much as possible (where the two walls adjoin) and attached with 2.5 inch sheetrock screws.
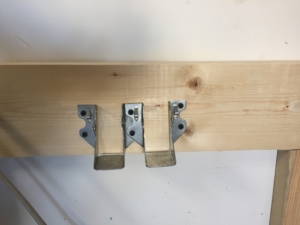
This measured 45 inches from center to center of the hangers. I measured 22.5 inches to the midpoint of each side, and attached the remaining two hangers. (I knew that this would have a slight overhang of plywood on both sides, and this turned out to be a good decision even though I lost about 1 inch of surface area on each edge.)
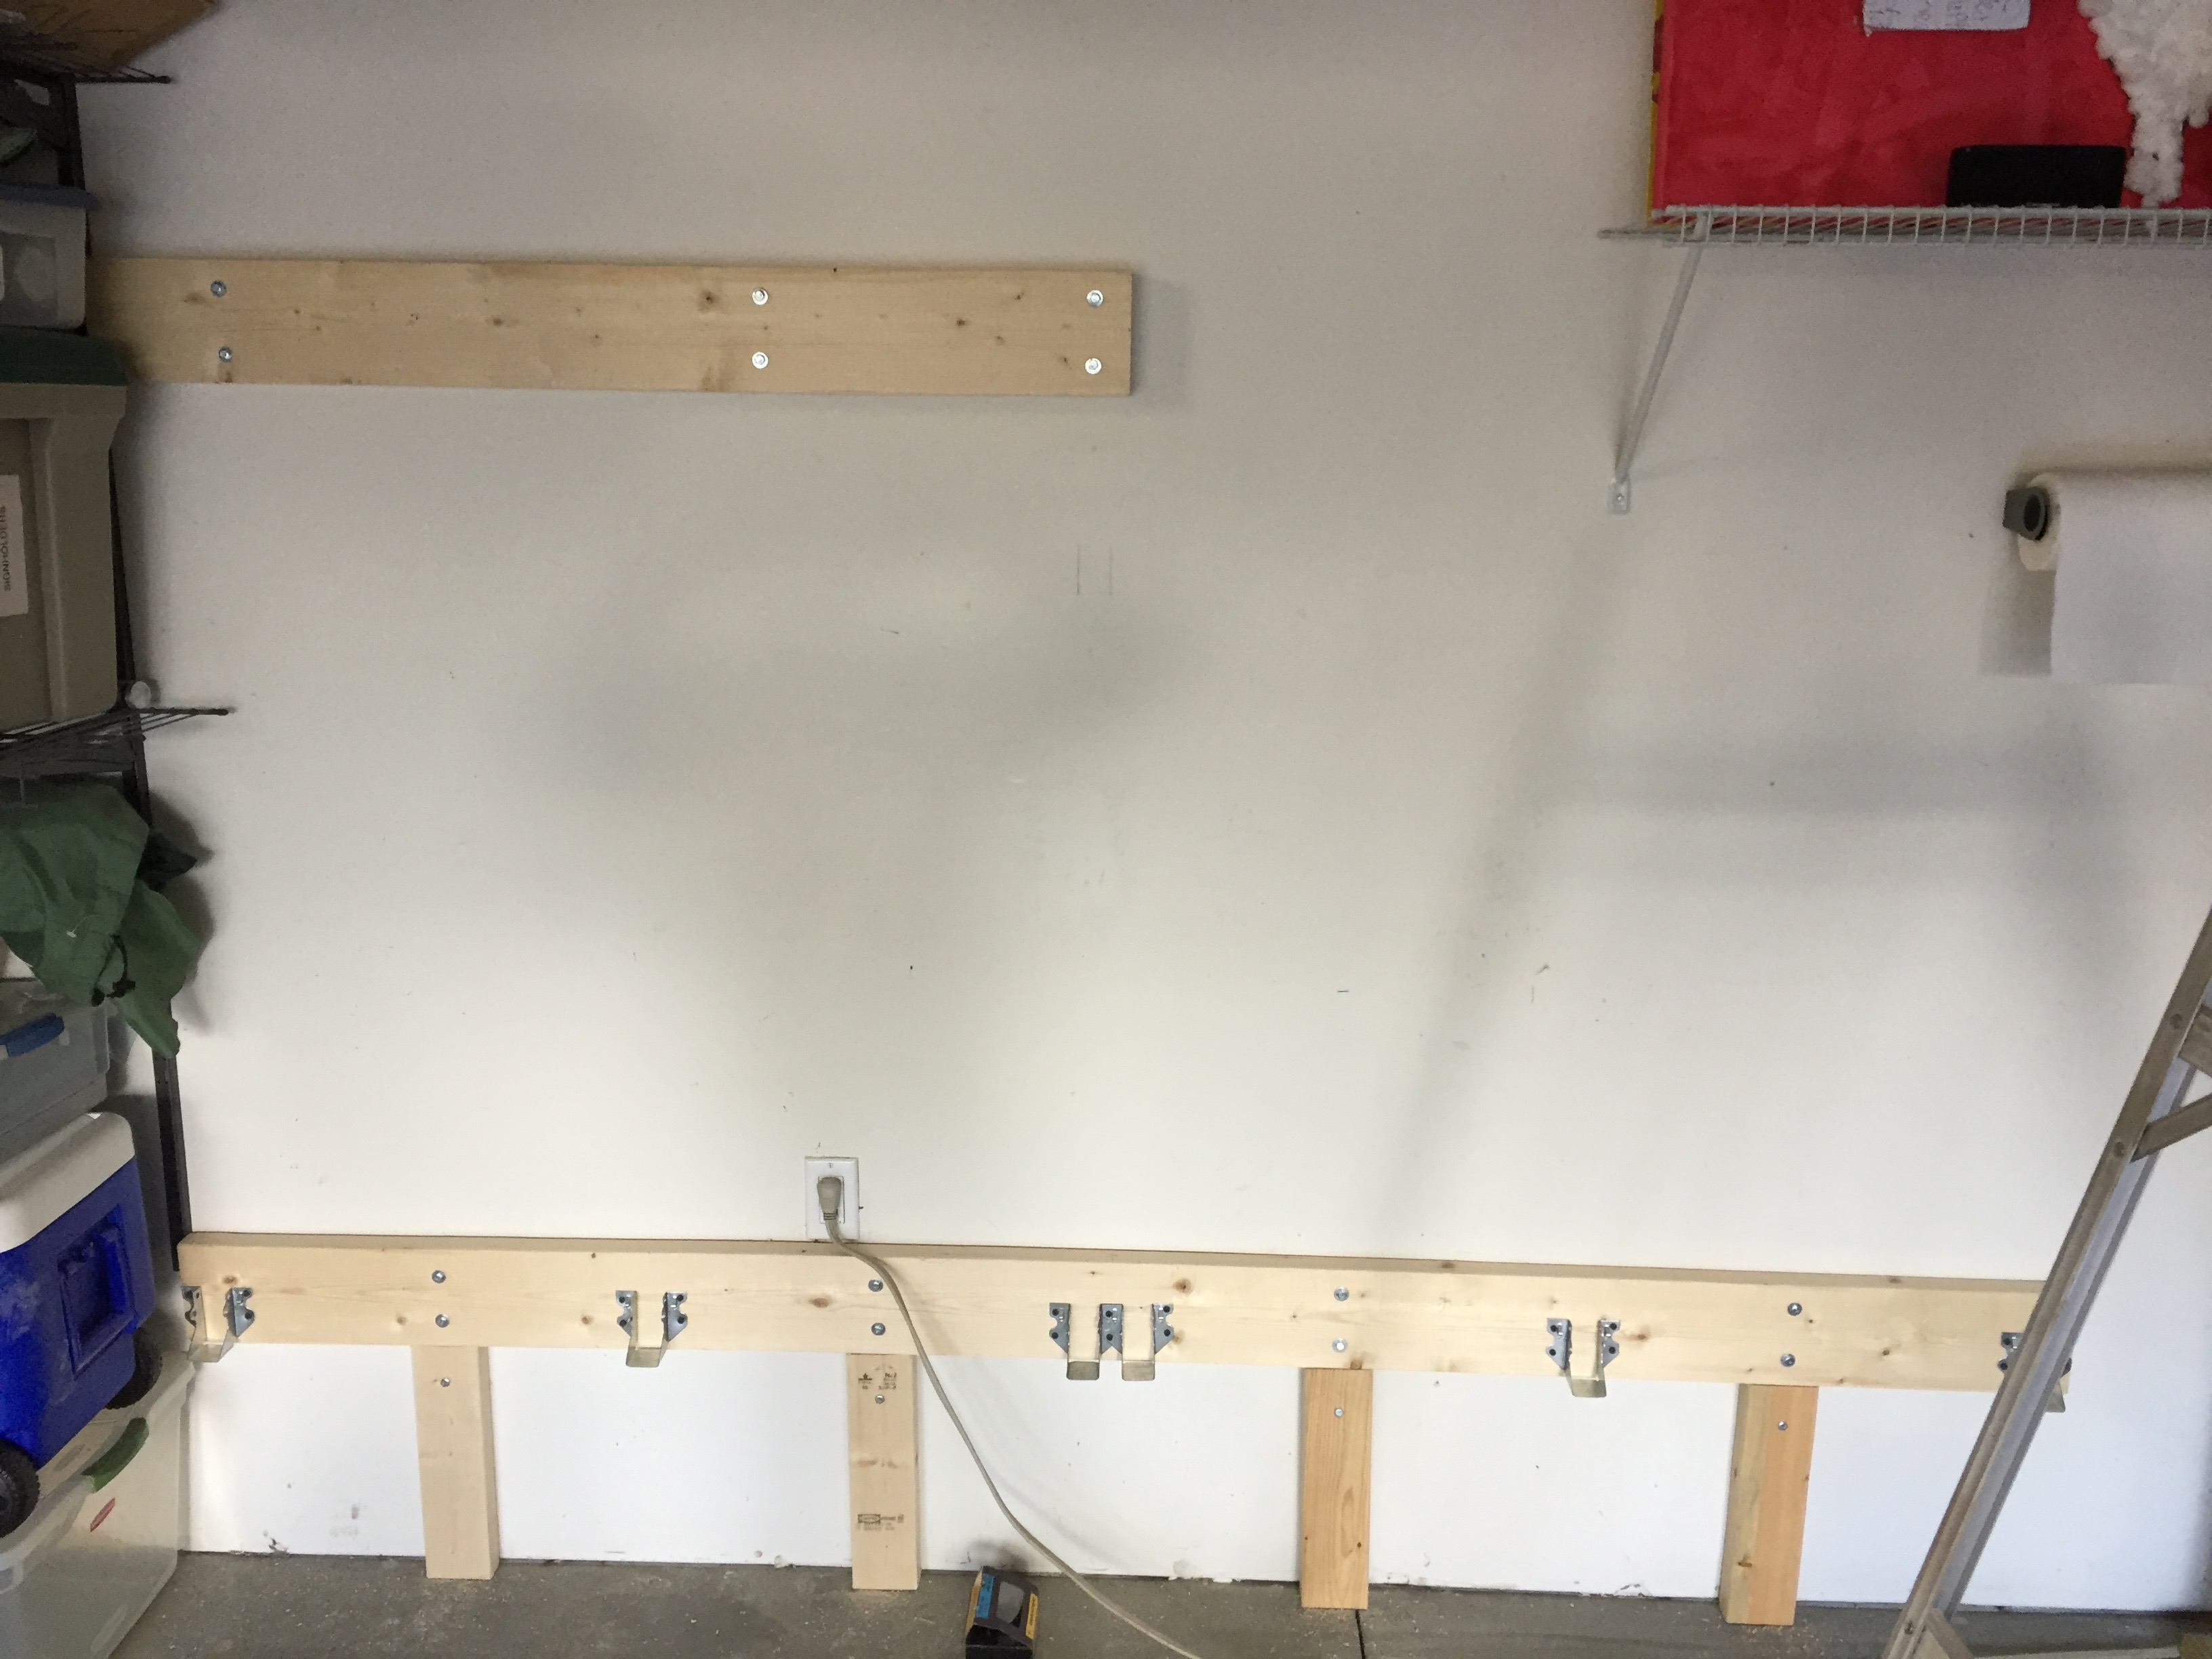
- To determine the location of my sleeper on the ceiling, I calculated the distance from the bottom of the joist hangers to the ceiling (111 inches) and subtracted 1.5 inches (the depth of the ceiling sleeper), for a height of 109.5. The math is easy for a 30 degree angle: half of 109.5 is 54.25 inches. So I measured this distance out from the wall and marked the line on the ceiling.
- I used my stud finder again to locate the joists in the ceiling and anchor my sleeper (8 foot 2×6) with the 3.5 inch lag screws and washers. (A word of warning: I used a socket attachment for my drill, which was fantastic. Perhaps because my pilot holes were a little too tight, on two occasions I snapped the head off the lag screw and had to sink another next to it more gently.) For strength, I put 3 lag screws into each joist.
- Next came a few more calculations. For a 45 degree wall, I already knew that the length and height of that section would be 52.75 inches. (I subtracted 1.5 inches for the wall sleeper from the 54.25 distance on the ceiling.) That meant that the vertical portion would be 111 – 52.75 = 58.25. So I measured 58.25 inches from the ceiling, marked a line, found the studs and anchored a 4 foot sleeper.

To these I attached joist hangers at the same distances as the sleeper below.

- The next step was to “build the box” that would frame the only vertical surface of the bouldering wall. I cut three of my 12 foot 2x6s to 58.25 inches for the vertical portion. I elected to use 2x4s for the three horizontal pieces simply to save weight. These I calculated should be 54.25 (wall to outer edge of sleeper) – 1.5 (wall sleeper depth) – 5.5 (depth of 2×6) = 47.25 inches.
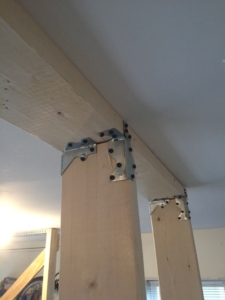
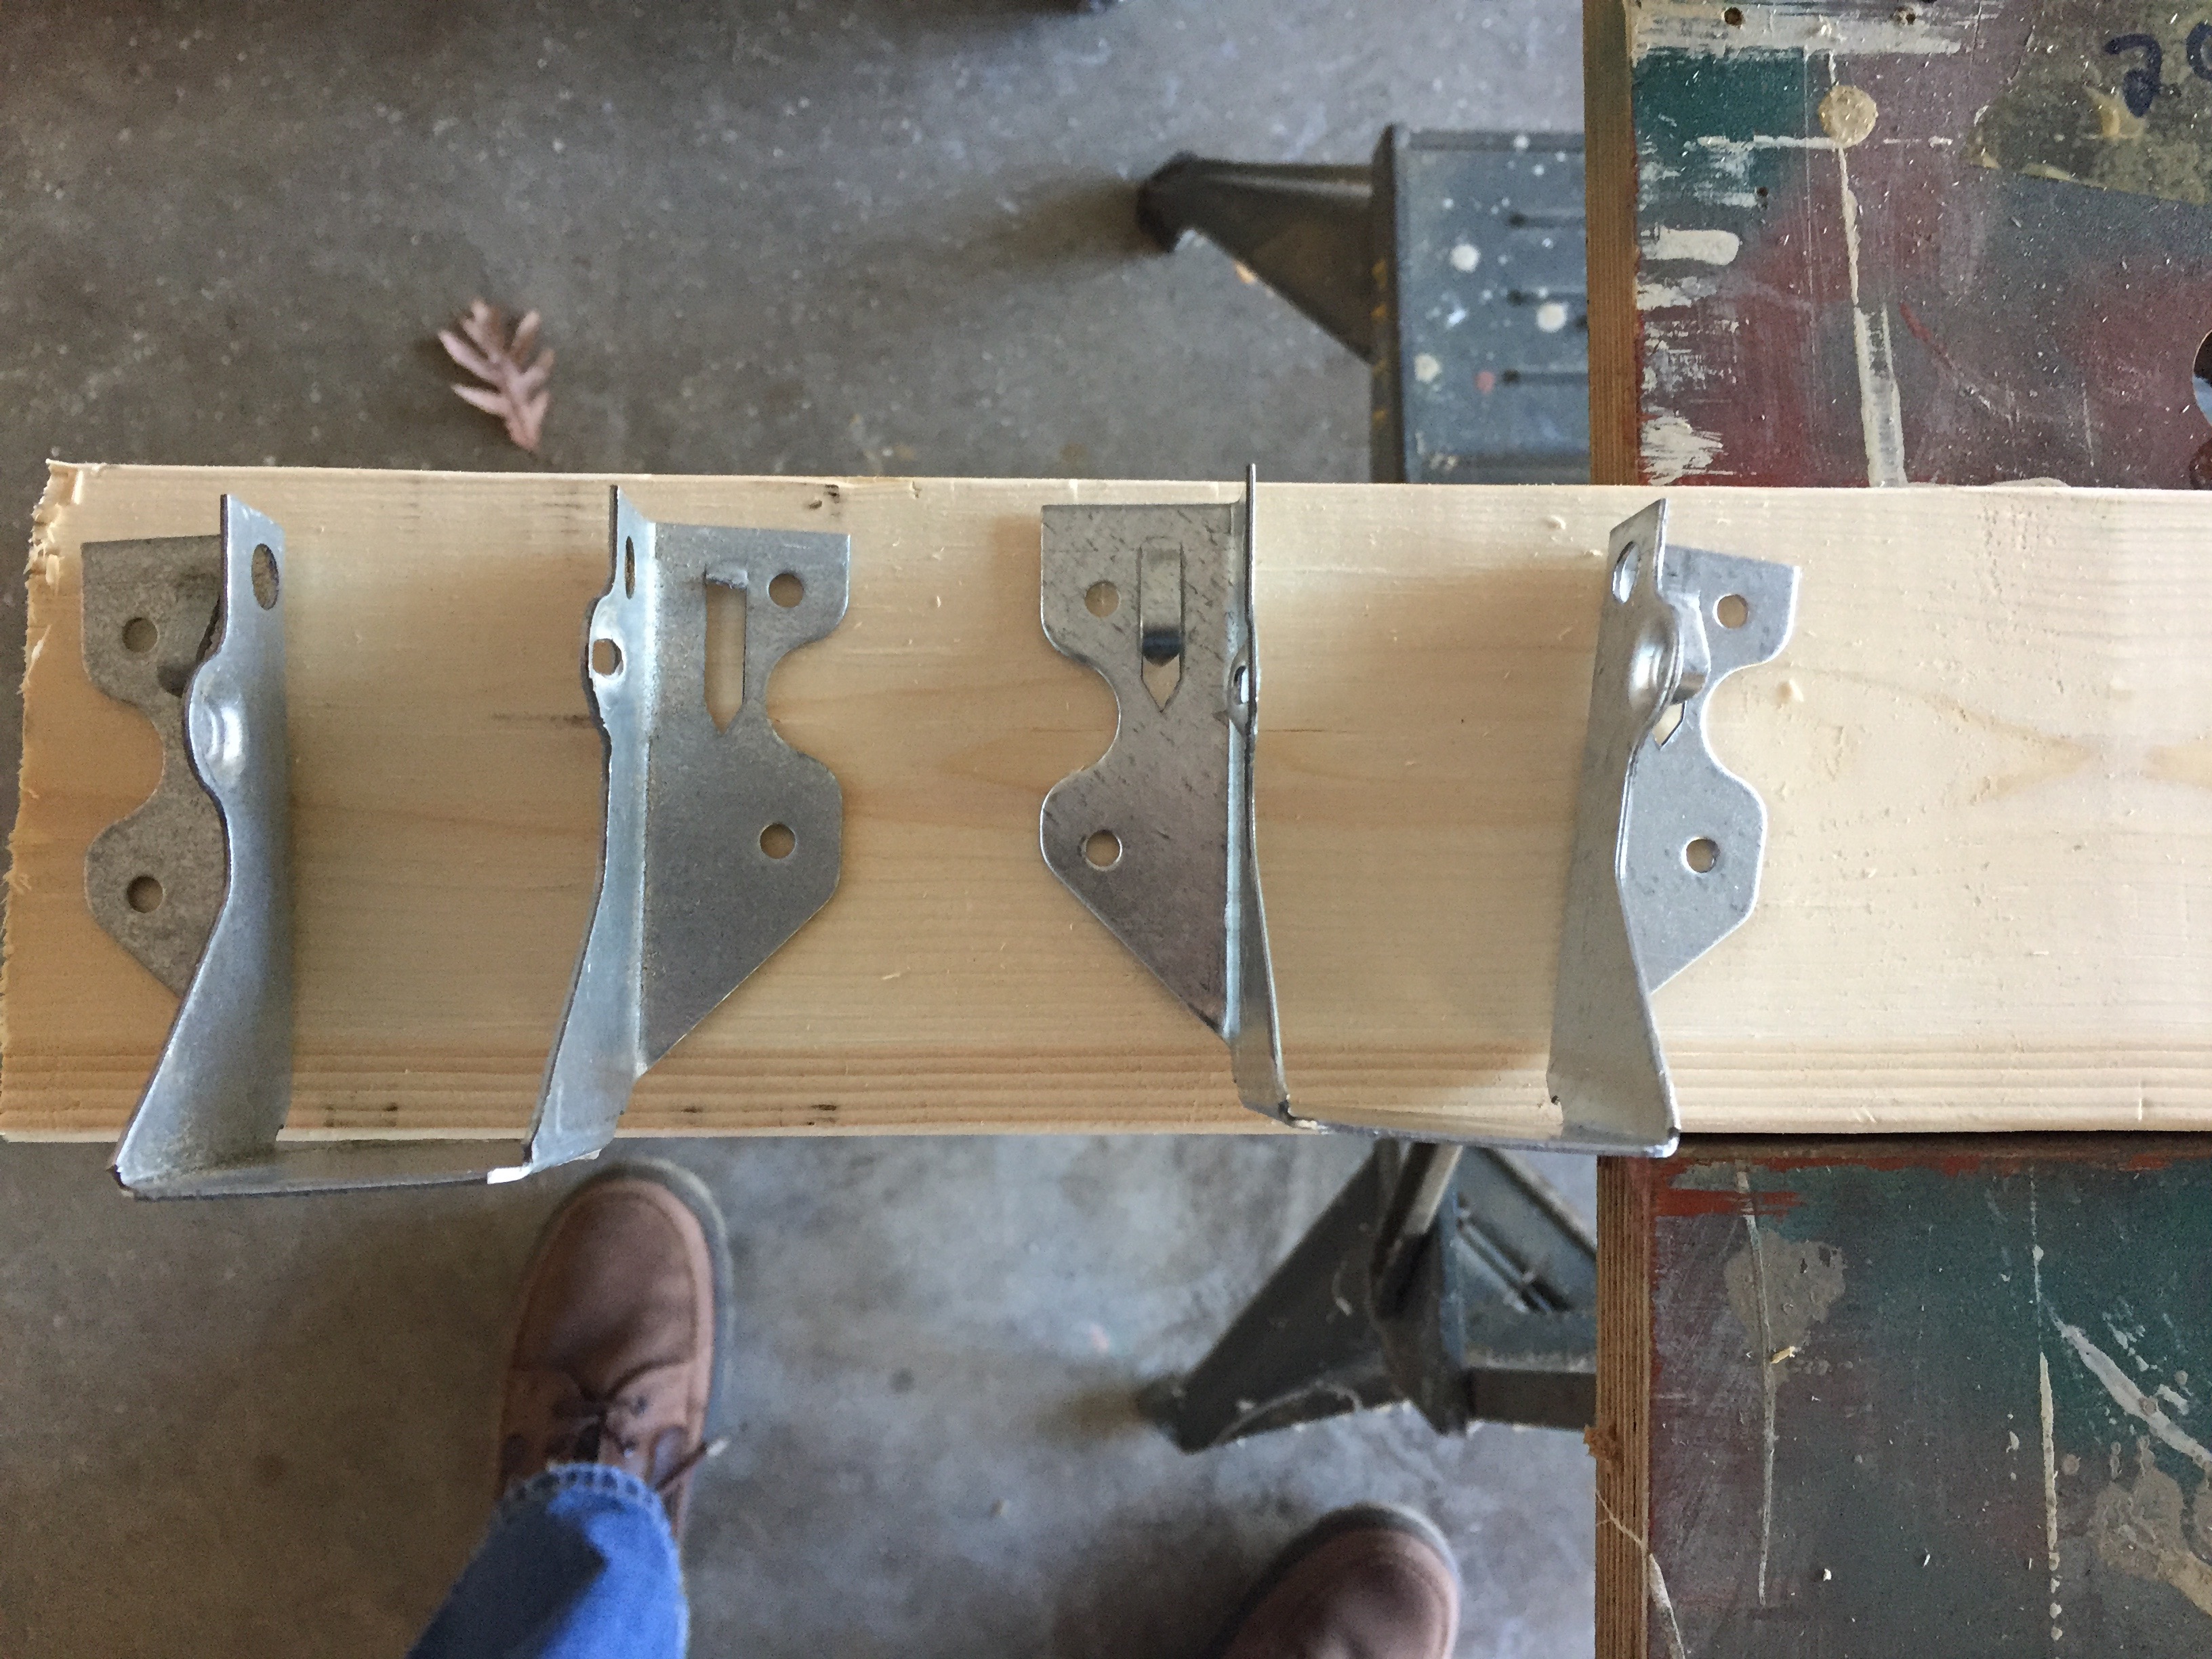
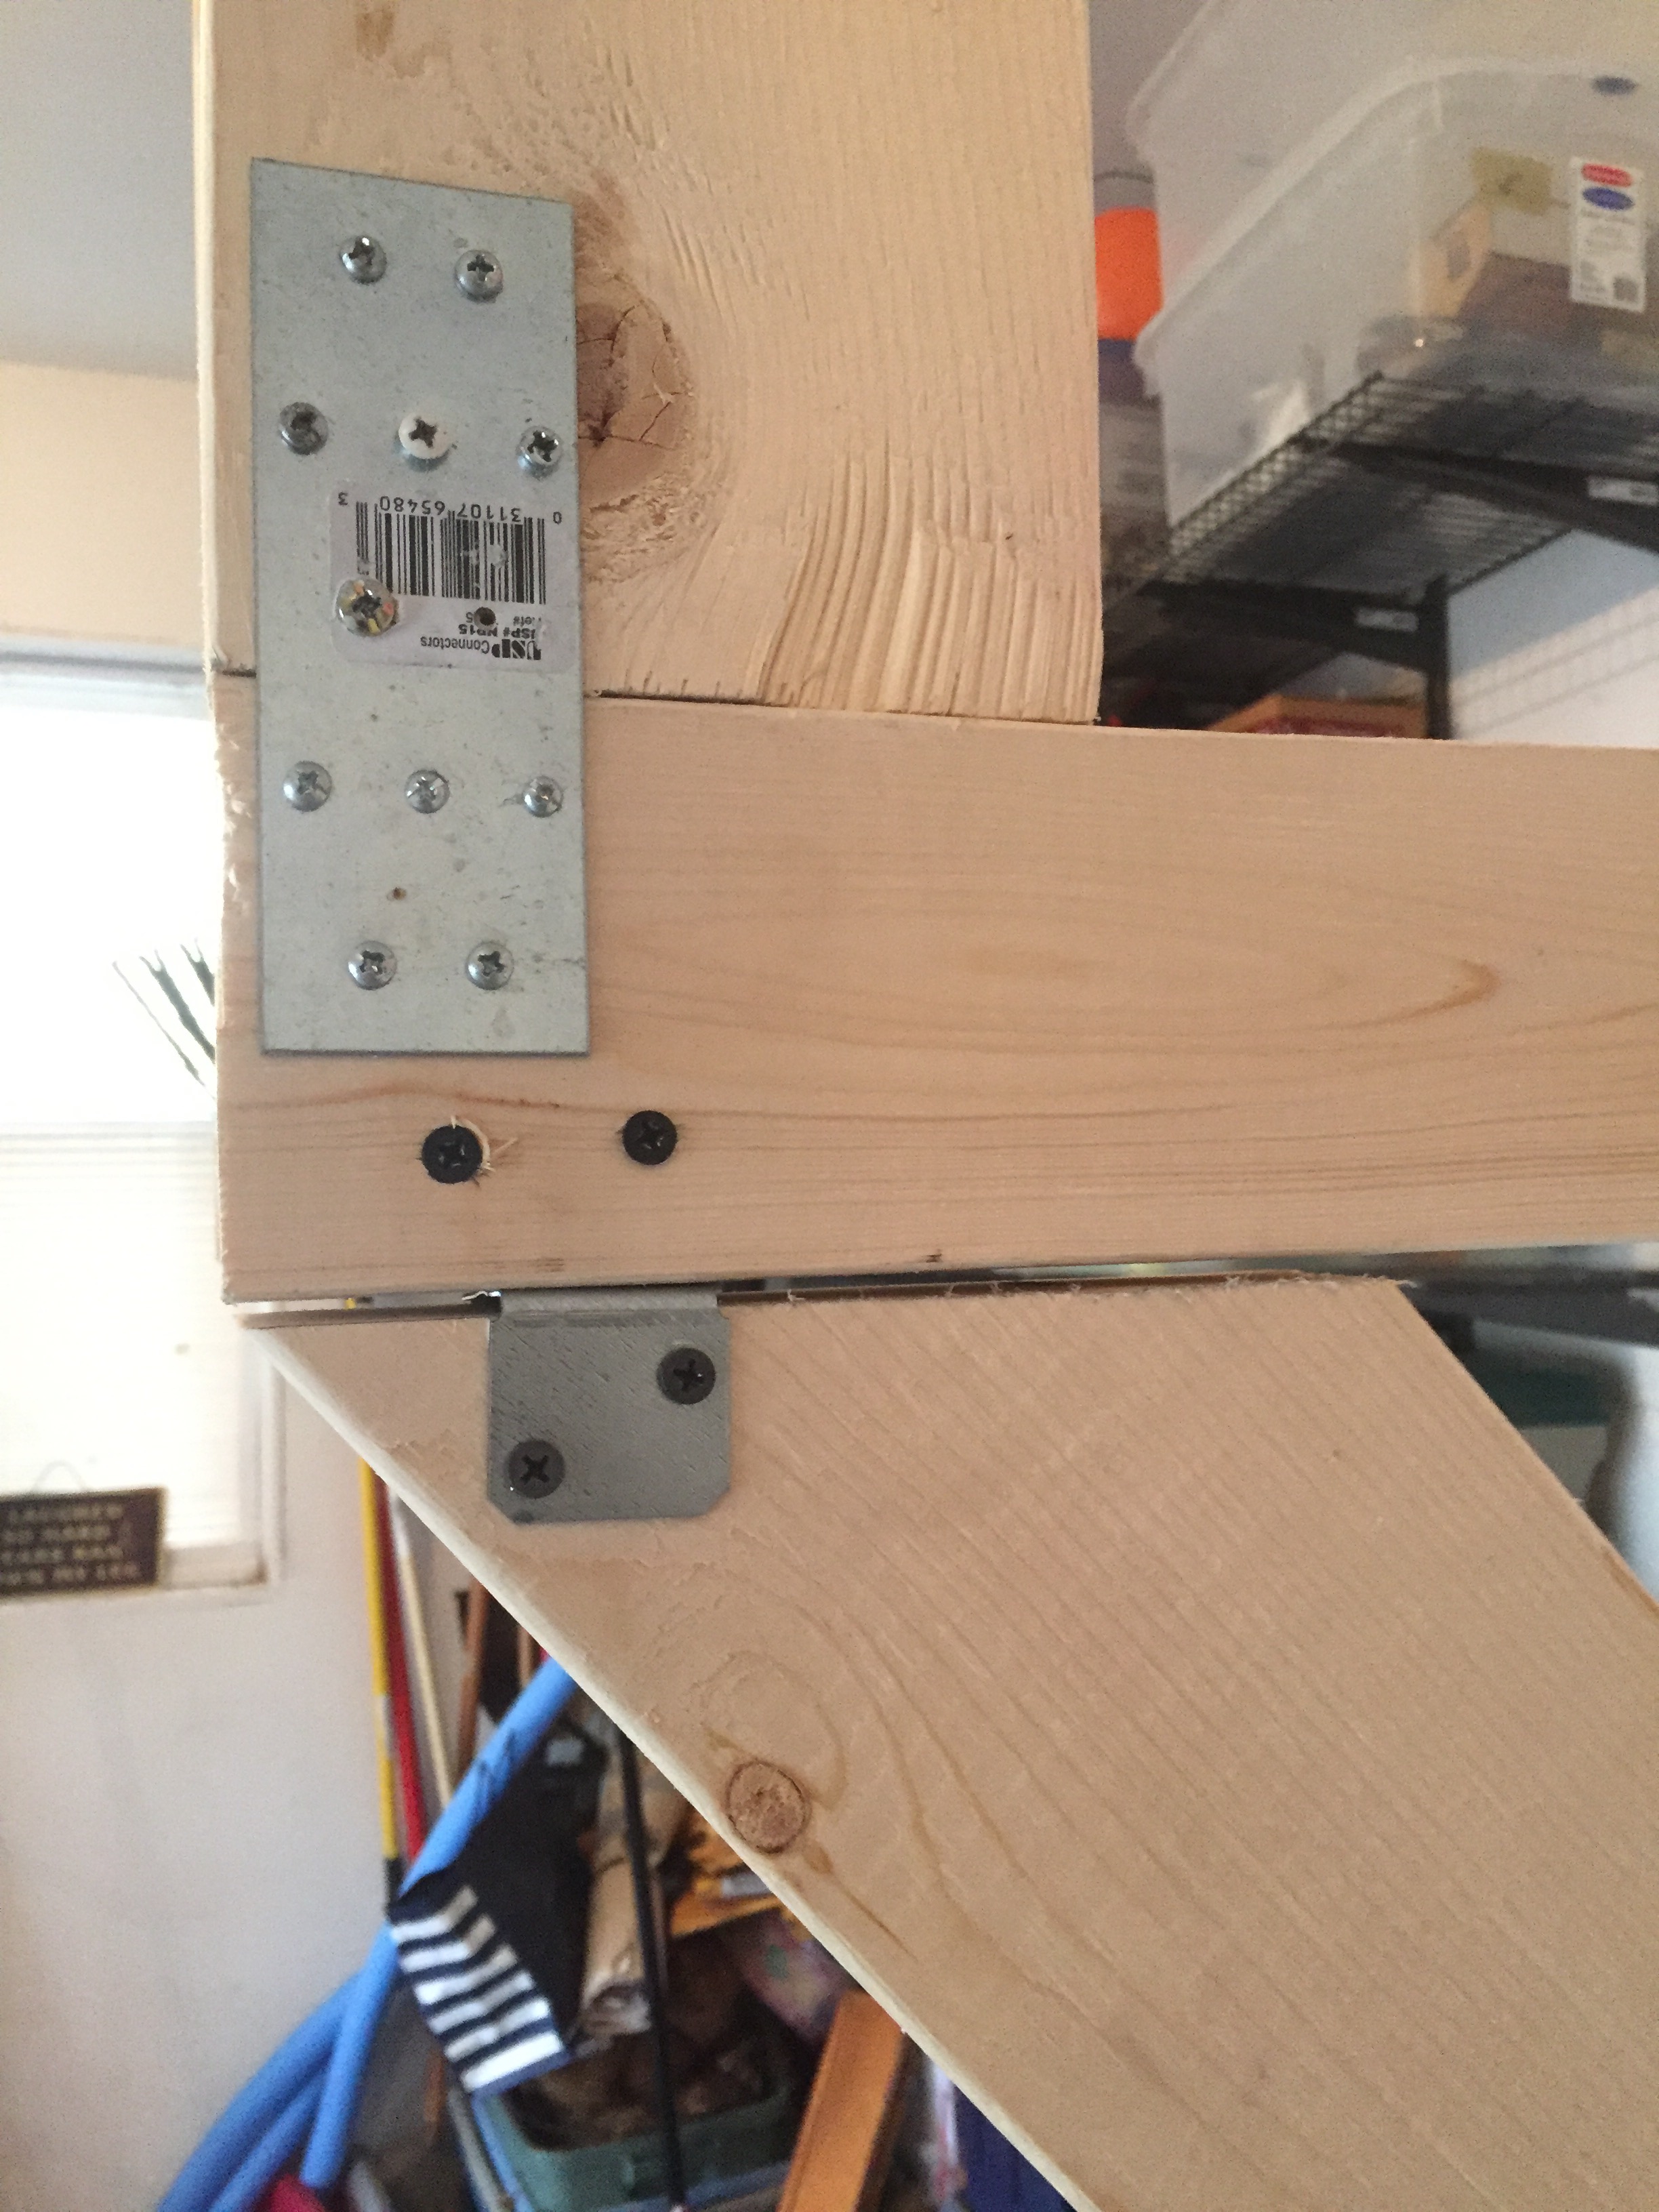
- I built the right angles on the ground using a nail plate on one side.
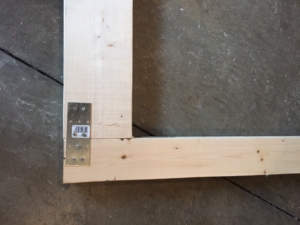
On the other side, I used a wrapping right angle bracket.
Together they were sturdy.

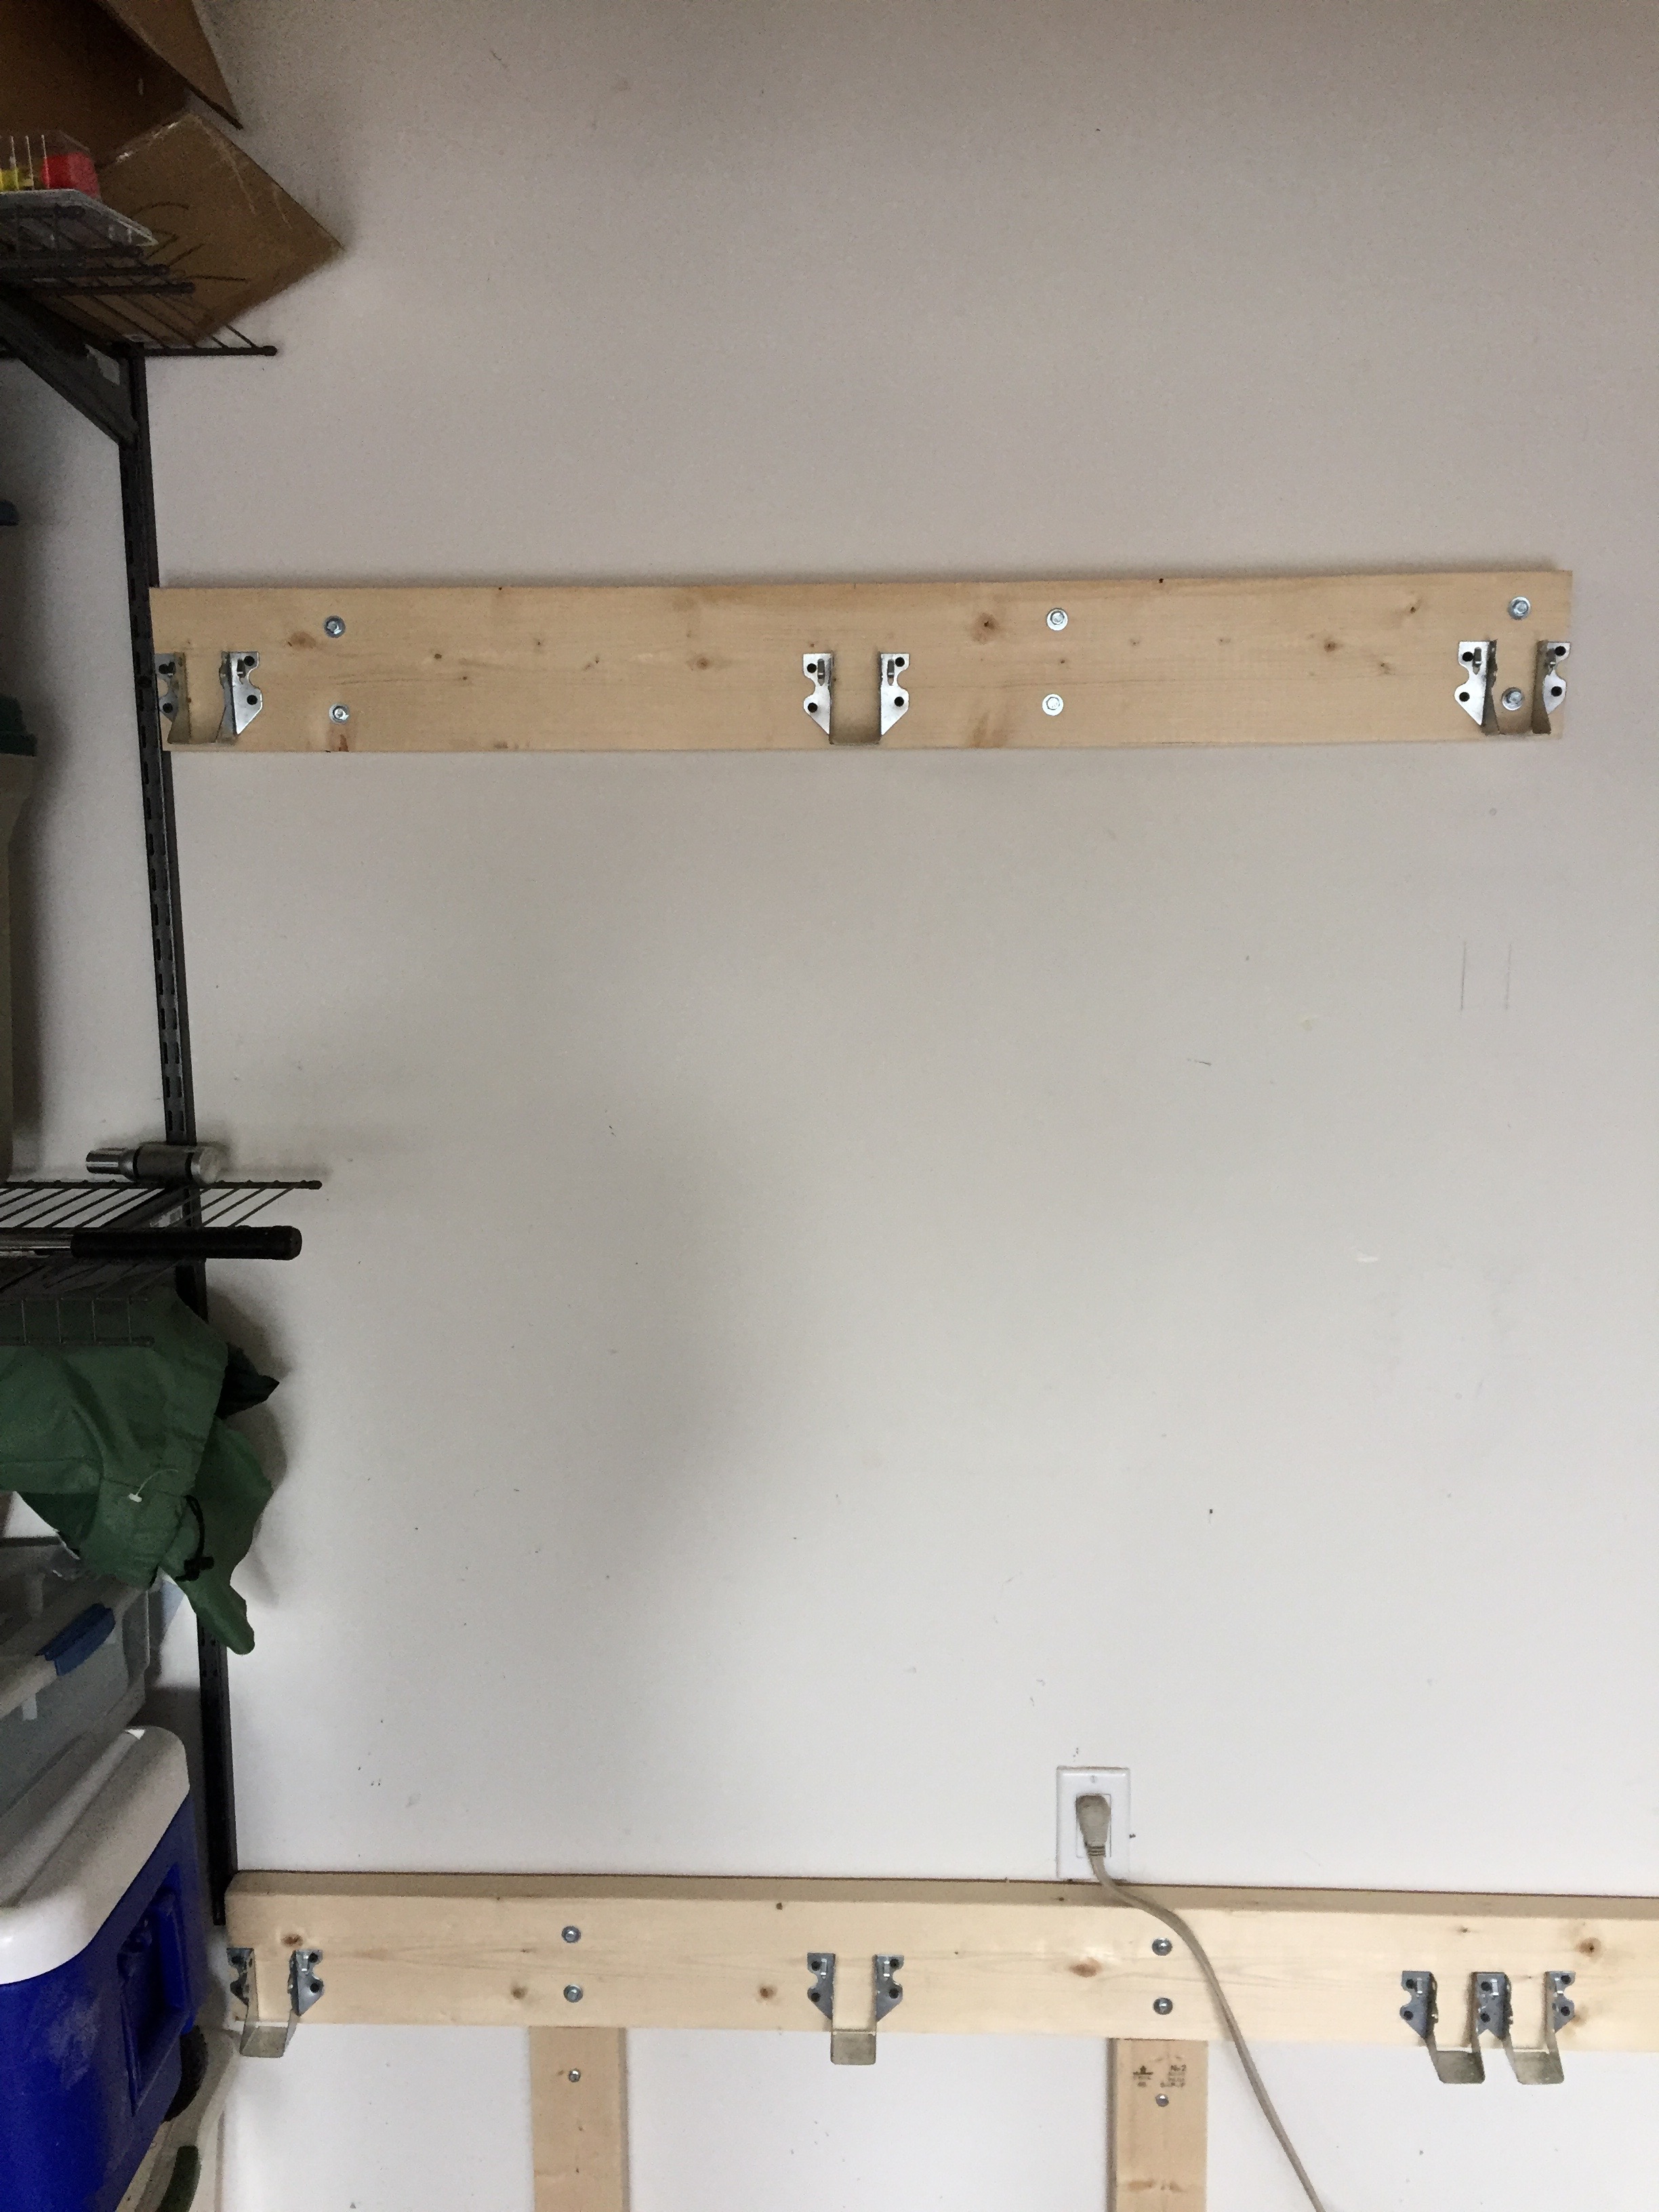
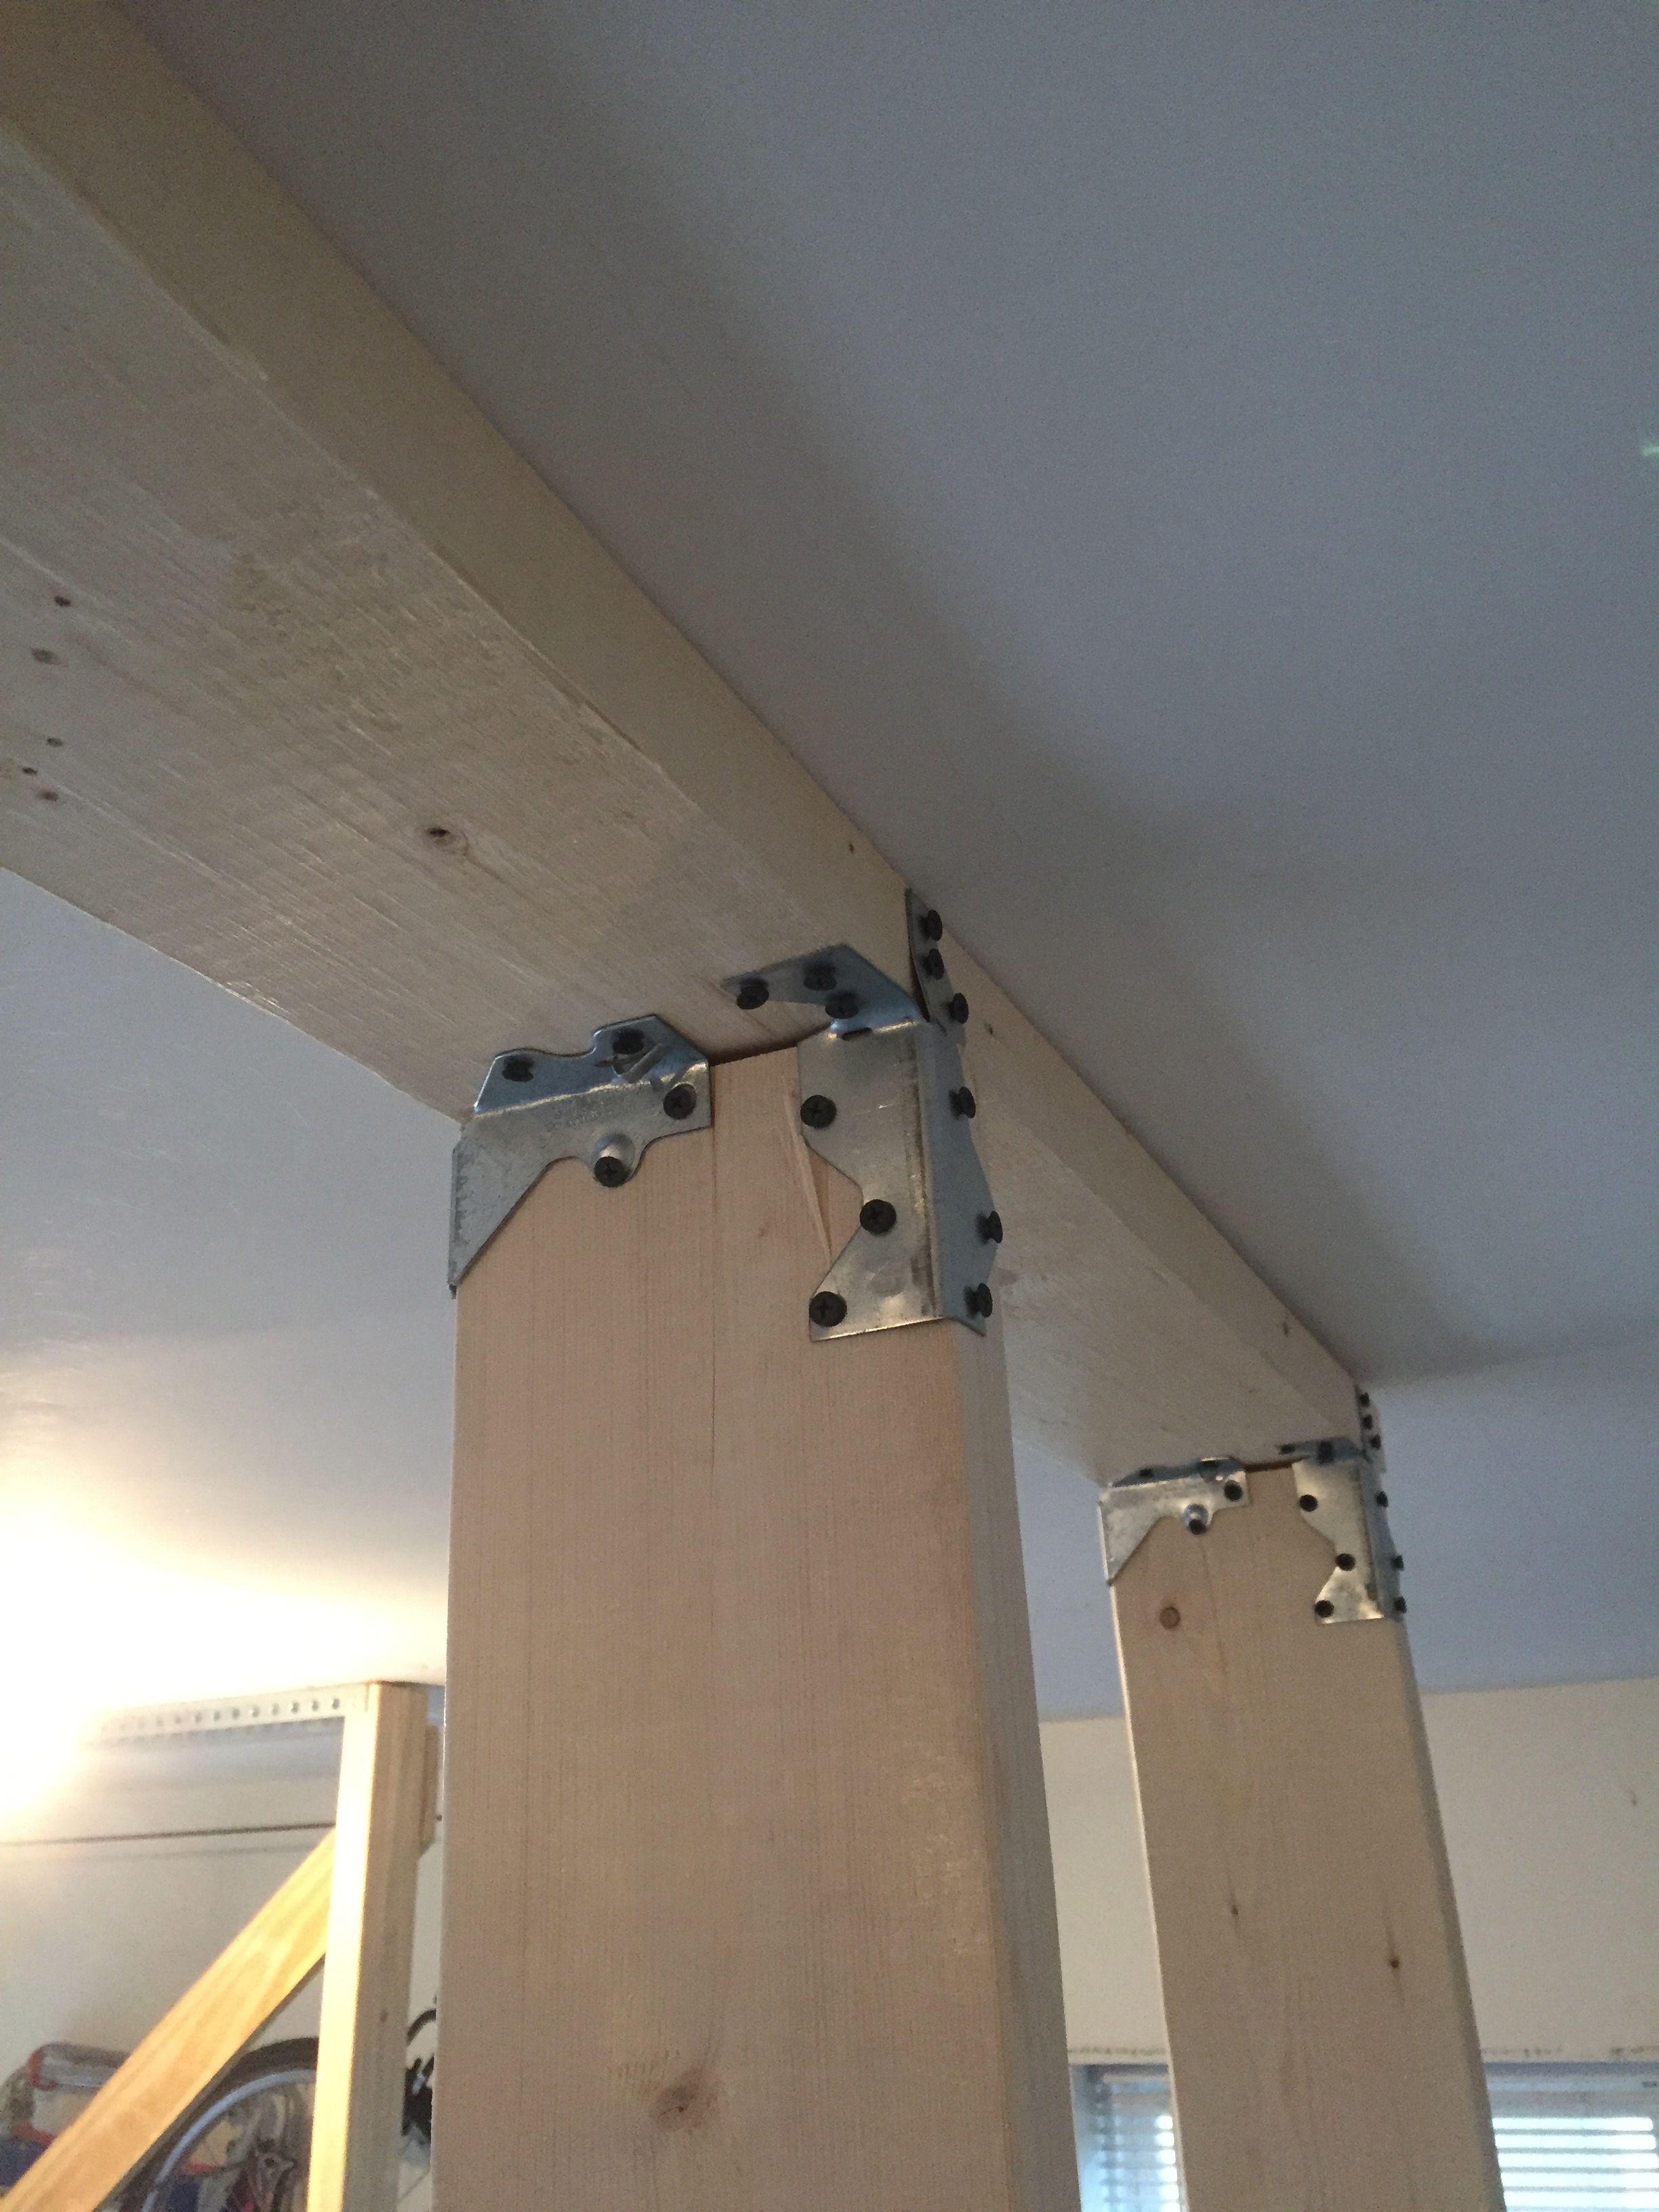
- With joist hangers already on the wall and the right angles built, I simply held the right angles in place and attached them to the ceiling with joist hangers. This didn’t feel strong enough to me, so I added a framing angle corner brace to each, and was very pleased with how solid they were.
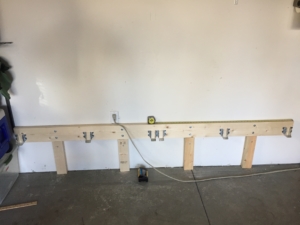
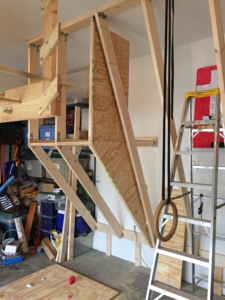
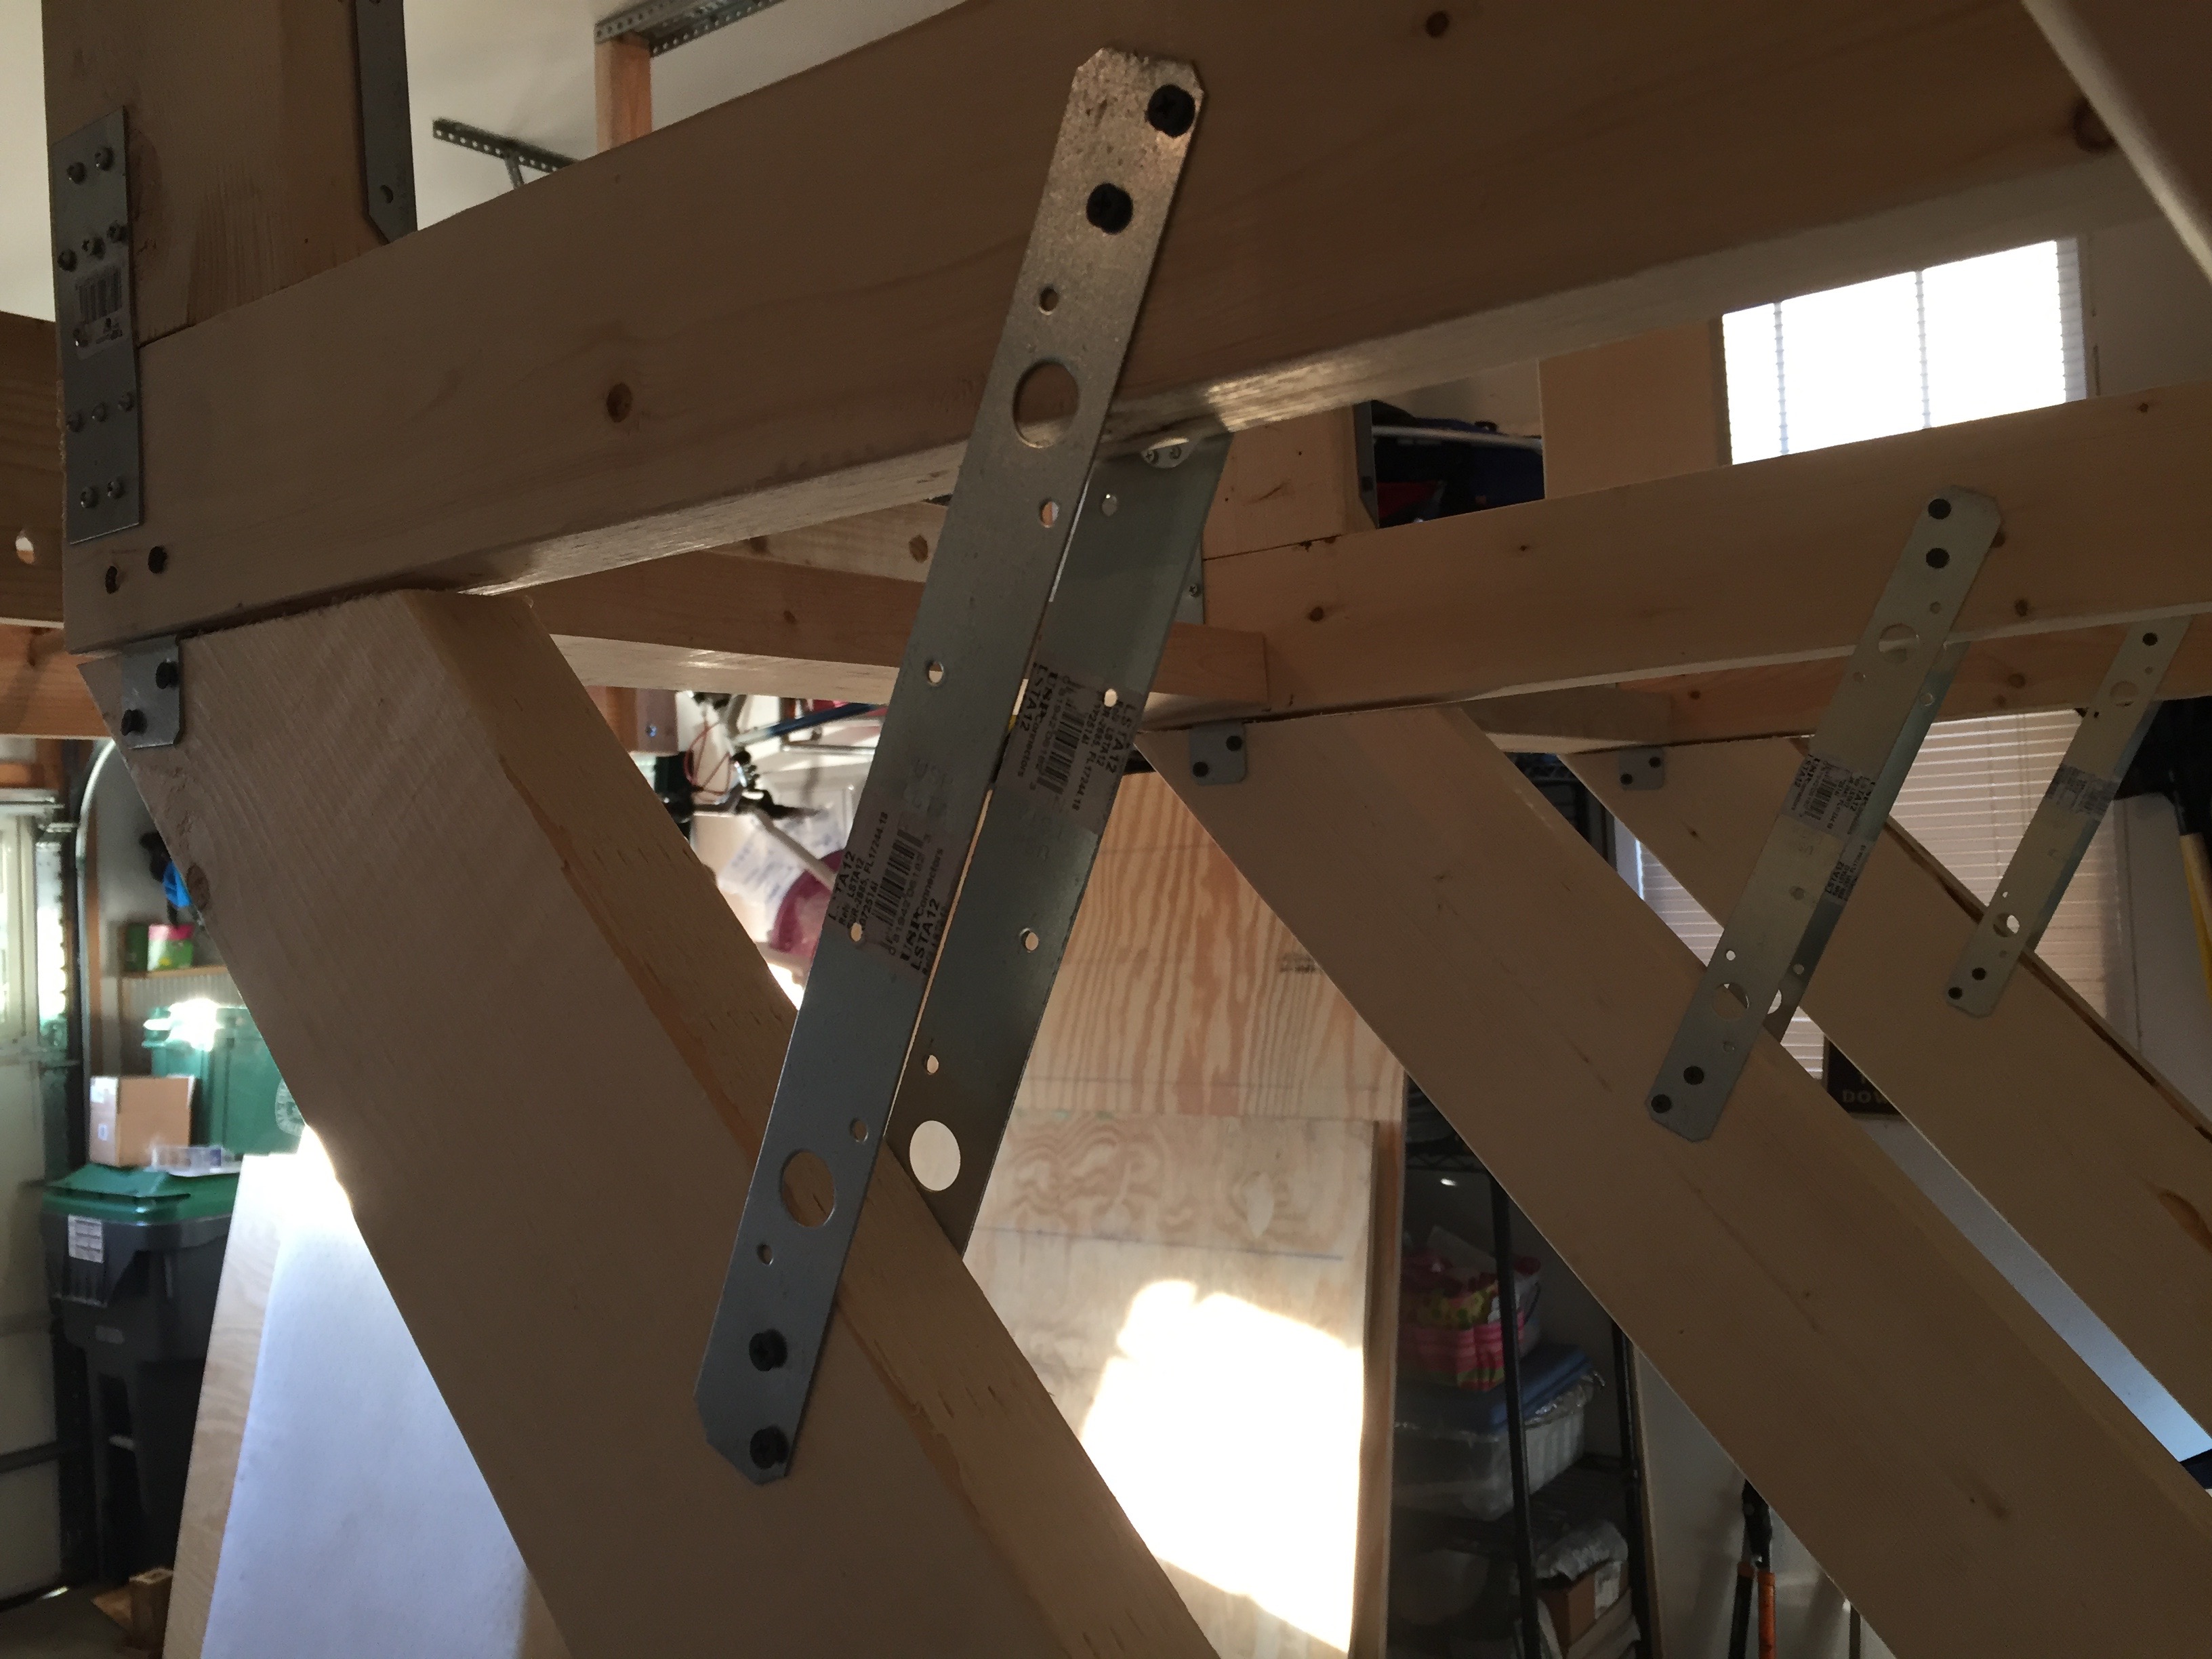
- To stabilize these 3 right angles, I measured the distance between the horizontal pieces on the wall sleeper, and cut two lengths of 2×4 to these dimensions and attached them using 2.5 inch sheetrock screws. You can just see one of them in this image.
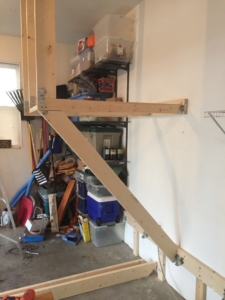
- You can also see the 45 degree piece in place above. Here I thought I’d use clever geometry and trigonometry to get perfect angles. What I did was much simpler and just as effective.
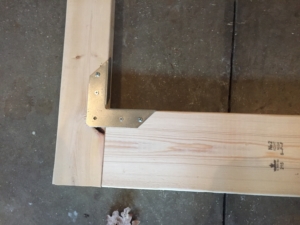
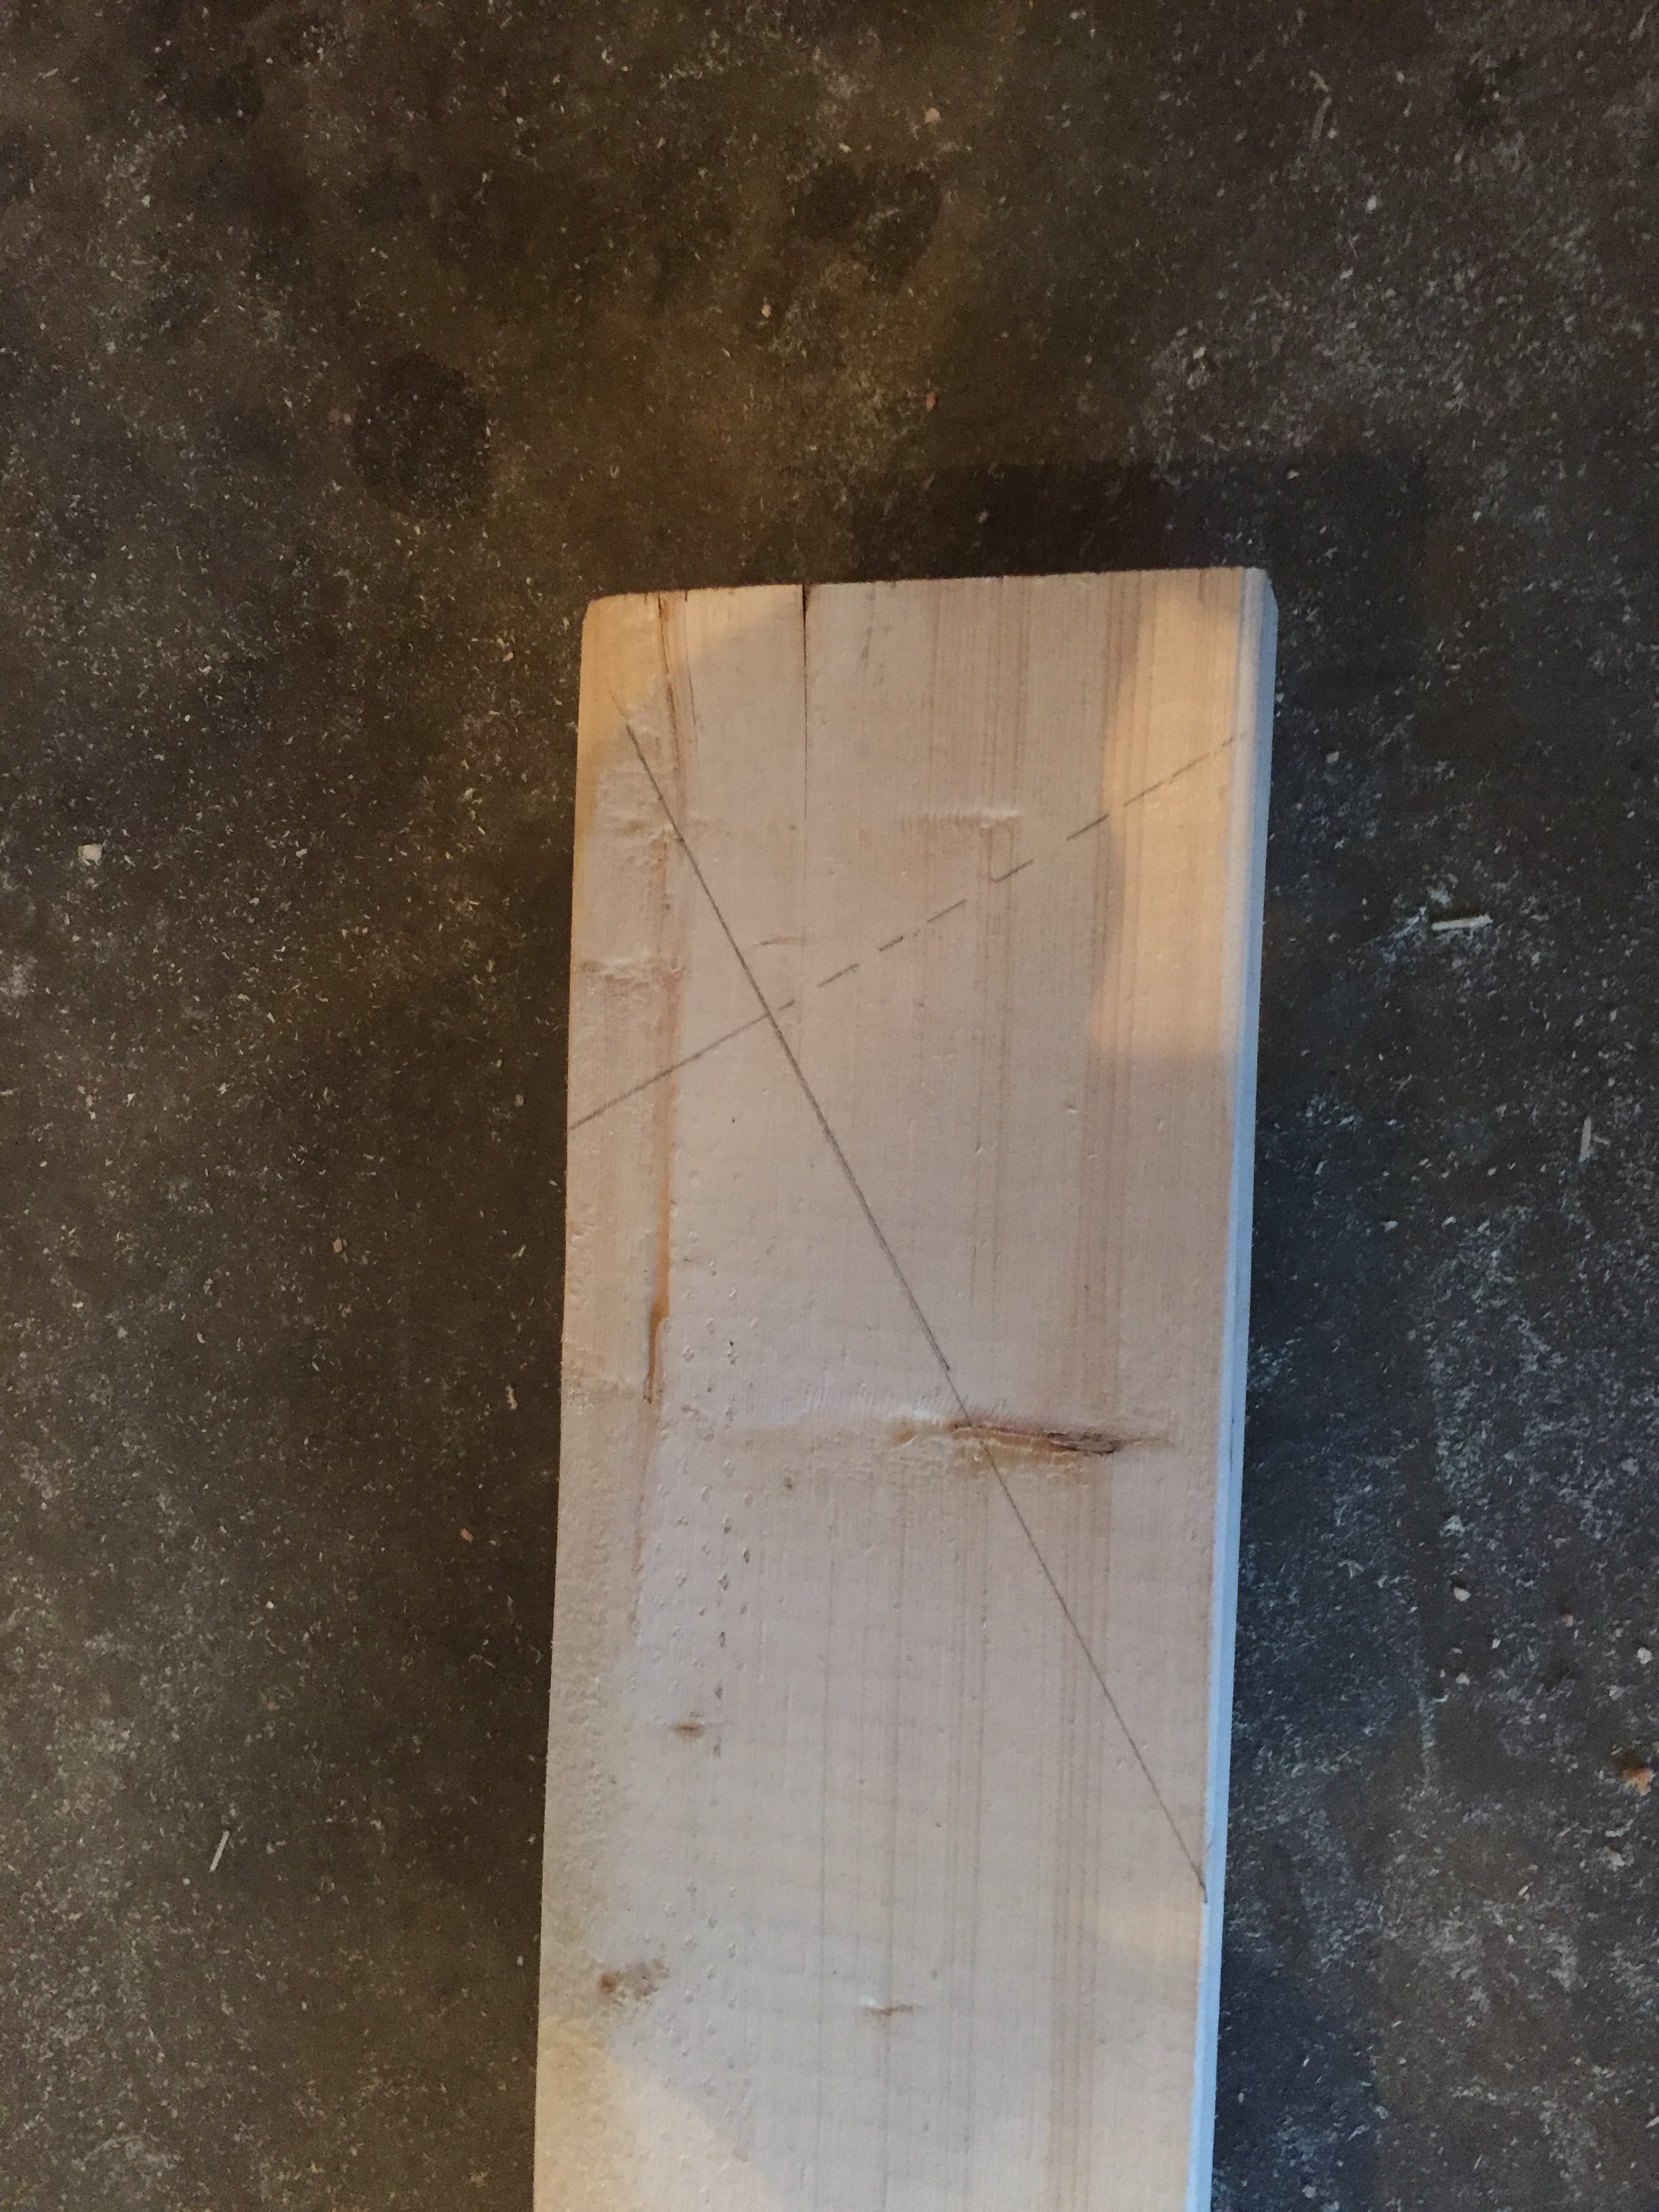
- I cut one end of the remnant of my 12 foot 2×6 (the other portion of which became the vertical portion of this wall) on a 45 degree angle with the table saw. (The picture below is actually the 60 degree marking for the longer joist, but same idea.)

I used the t-square to mark a right angle that provided the 2 inch portion that would sit on the bottom of the joist hanger. - Once cut, I simply nested this in the joist hanger on the wall right next to the box hanging from the ceiling, and used a pencil to mark the other angle to be cut. I cut this on the table saw. Once I fitted it and confirmed the fit, I used that piece as a “jig” to mark the other two 2×6 remnants and cut them to identical size.
- I cut one end of the remnant of my 12 foot 2×6 (the other portion of which became the vertical portion of this wall) on a 45 degree angle with the table saw. (The picture below is actually the 60 degree marking for the longer joist, but same idea.)
- I attached these joists to the box using a double 90 degree bracket (and screwed it into the joist hangers on the wall). For all these attachments, I needed the 1.25 inch sheet rock screws.
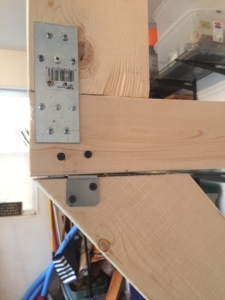
- For structural strength, each 45 degree piece is attached by TWO strap ties to the horizontal piece.

- Now that the 45 degree and vertical frame was complete and solid, I turned to the 30 degree wall, which I thought would be easier. The first part was easier. I measured and cut a 60 degree angle at one end of a 12 foot 2×6, and provided the 2 inch surface for it to sit in the joist hanger, just as I had on the 45 degree wall. I tried (and failed) to used trigonometry to calculate the length of the outside edge of the joist. It ended up about an inch and a quarter too long. [Always better to be too long!] Rather than abuse my calculator until it gave me a good calculation, I estimated and trimmed the joist a couple of times until it fit nicely. Then I used this one as a jig for the remaining two joists. (I’d actually recommend this method of fitting for a 30 degree wall with a face this long. Slight imperfections of wall angles and materials make the try and fit method well suited to getting it good enough for a climbing wall.)
- With those three pieces cut, I realized that joist hangers would be ill-suited to attach these to the ceiling sleeper, and elected to use two framing angle corner braces on each joist. (This ended up being another trip to the hardware store.) They are rock solid, and I’d seriously consider using the framing angle corner braces without joist hangers for the vertical attachment to the ceiling, so well did it work.
I should note at this point that I had a friend help me attach the sleeper to the ceiling (no chance I could have done it alone), and my thirteen-year-old daughter was a fantastic help in holding long pieces when cutting on the table saw. (My cuts of a 12 foot 2×6 would have been hilariously bad without her steady hand.) For these you NEED help. For the rest, one person can manage the work. - The next step was to measure and cut the plywood sheets.
- My first section was the vertical one, which I cut to 58.25 inches.
- The second section was the 45 degree wall, for which I simply measured the joists in place, and cut to 74 inches.
- For the 30 degree wall, I measured from top to bottom and cut a 26 inch segment to be hung at the top, and then left one full 4×8 sheet to attach below.
- Using the remnant from the sheet that I cut off 58.25 inches, I mounted this on the side of the 90 degree box with 1.25 inch sheetrock screws. I didn’t bother to trip off the unseen part, but left it as a rectangle.
- I used a remnant from the 45 degree wall to cover a portion of the lower angle. (Again, my measuring was crude. I held it it place, marked it with pencil, and used the table saw to cut.) These I attached with the same 1.25 inch sheetrock screws, roughly every 9 inches.
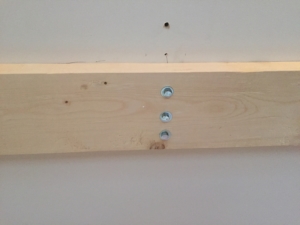
- The next step was to drill 1/2 inch holes for the holds in a roughly 8 inch grid on all 4 panels. I used a 1/2 inch spade drill bit. From what I’d read online, the reason to drill these first is to be able to attach all the t-nuts to the back side before hanging the wall. If I did it again, I would do all of this drilling after hanging the plywood. Because of the pitch of the wall, I can get behind the wall to tap in t-nuts (which I have done, so I know it works well).
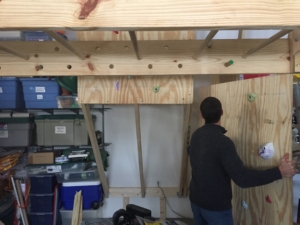
- To my surprise, the most physically difficult part of the project was hanging the plywood. I had two teenage boys help, and even with their strength, the placement was difficult because of the weight. Here’s how we did it:
- The first outside face was the vertical one. They young men held it up, and one ensured that it was flush with the intervening wall I had already hung. I stood on the ladder and tapped two 2.5 inch sheetrock screws in each joist to hold it in place before setting screws every 9 inches. Despite having help, this piece was not hung perfectly.
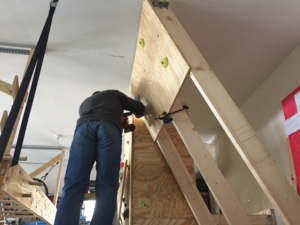
- The second face was the 45 degree wall. This time I had two teenage boys and two teenage girls to hold it in place, and getting it just right (adjoining as closely as possible to the vertical panel) was still a challenge! Again the strategy was the same: set two screws on each joist to hold it in place, and follow up with screws every 9 inches.
(We have no action shots of this because all hands were holding wood, not cameras!) - The third, and easiest piece, was the 26-inch piece on the top of the 30 degree wall. I stood on the ladder and brought it flush to the intervening wall and almost flush to the ceiling. There I clamped it so that I could set 2 screws in each joist.
- The final panel was the full 4×8 sheet that completed the 30 degree wall. Again, even with the help of two young men holding it flush to the intervening wall, and keeping it pressed against the 26 inch panel at the top while I tapped the first few screws was very challenging because of the weight and angle of the panel. (This was the only advantage to having some holds attached, that it provided help for the boys in holding the panel up in place.)


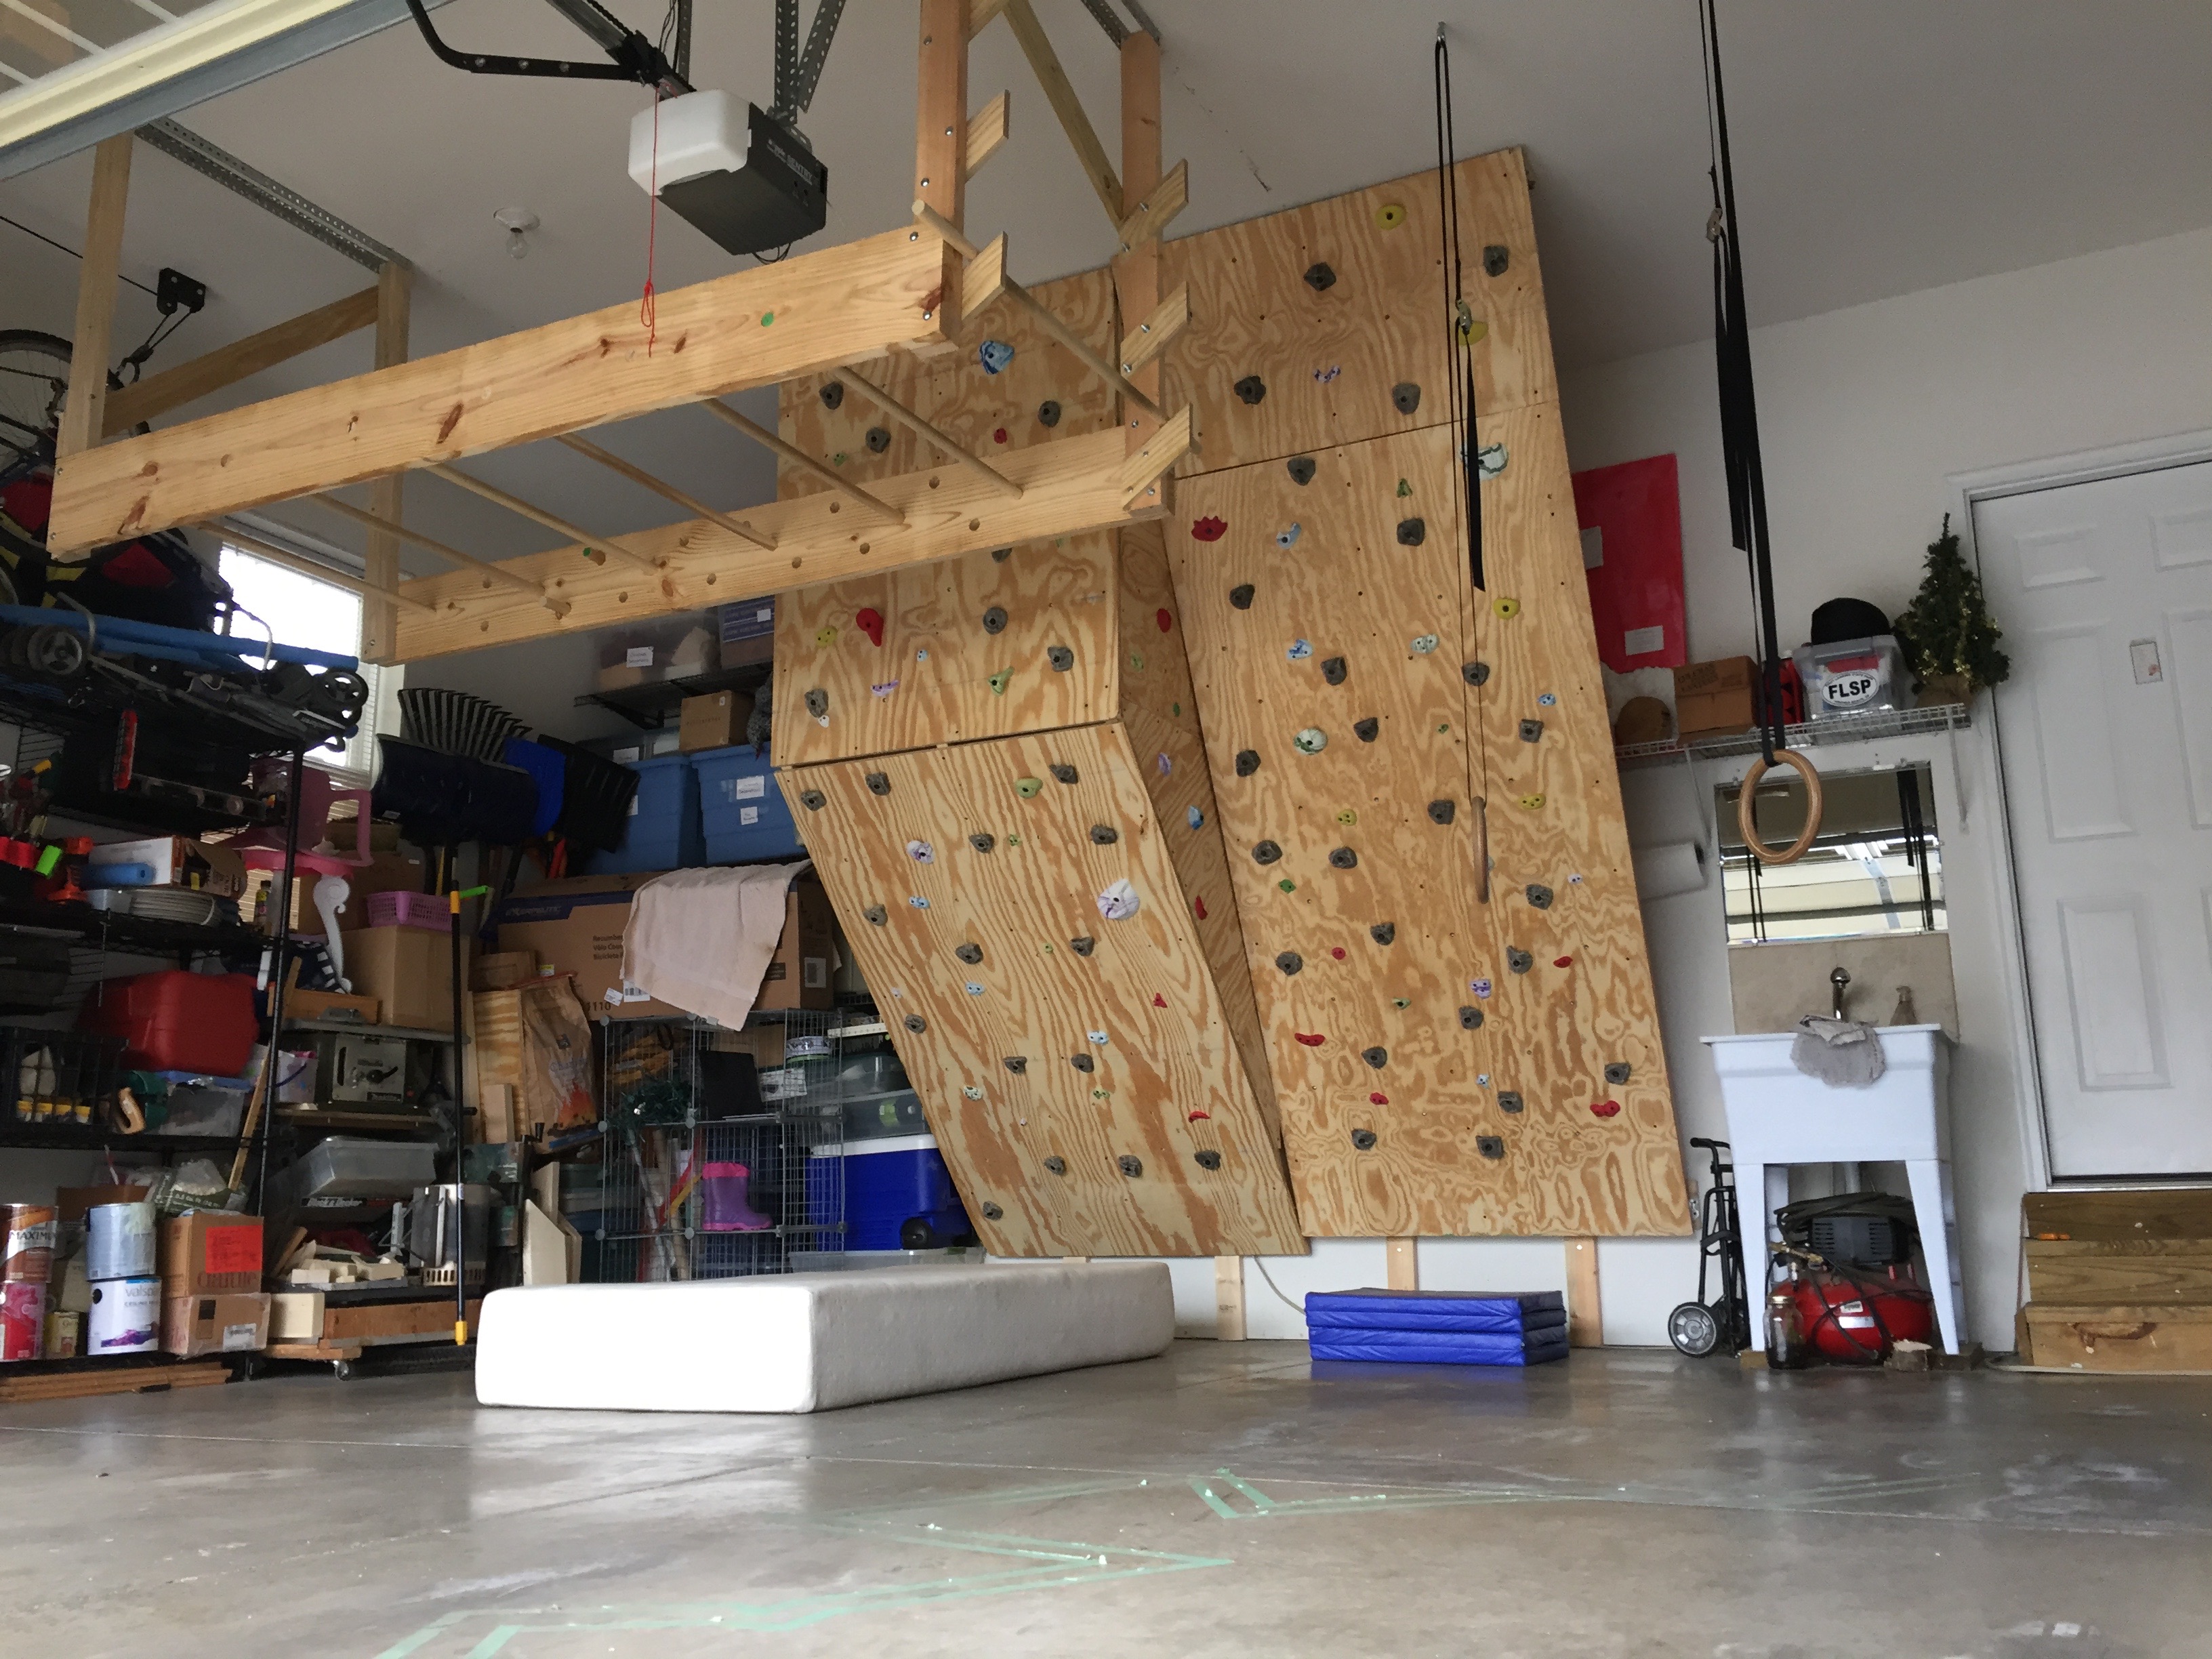
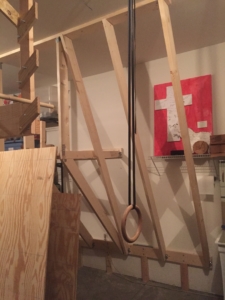
Now we have the full structure in place!
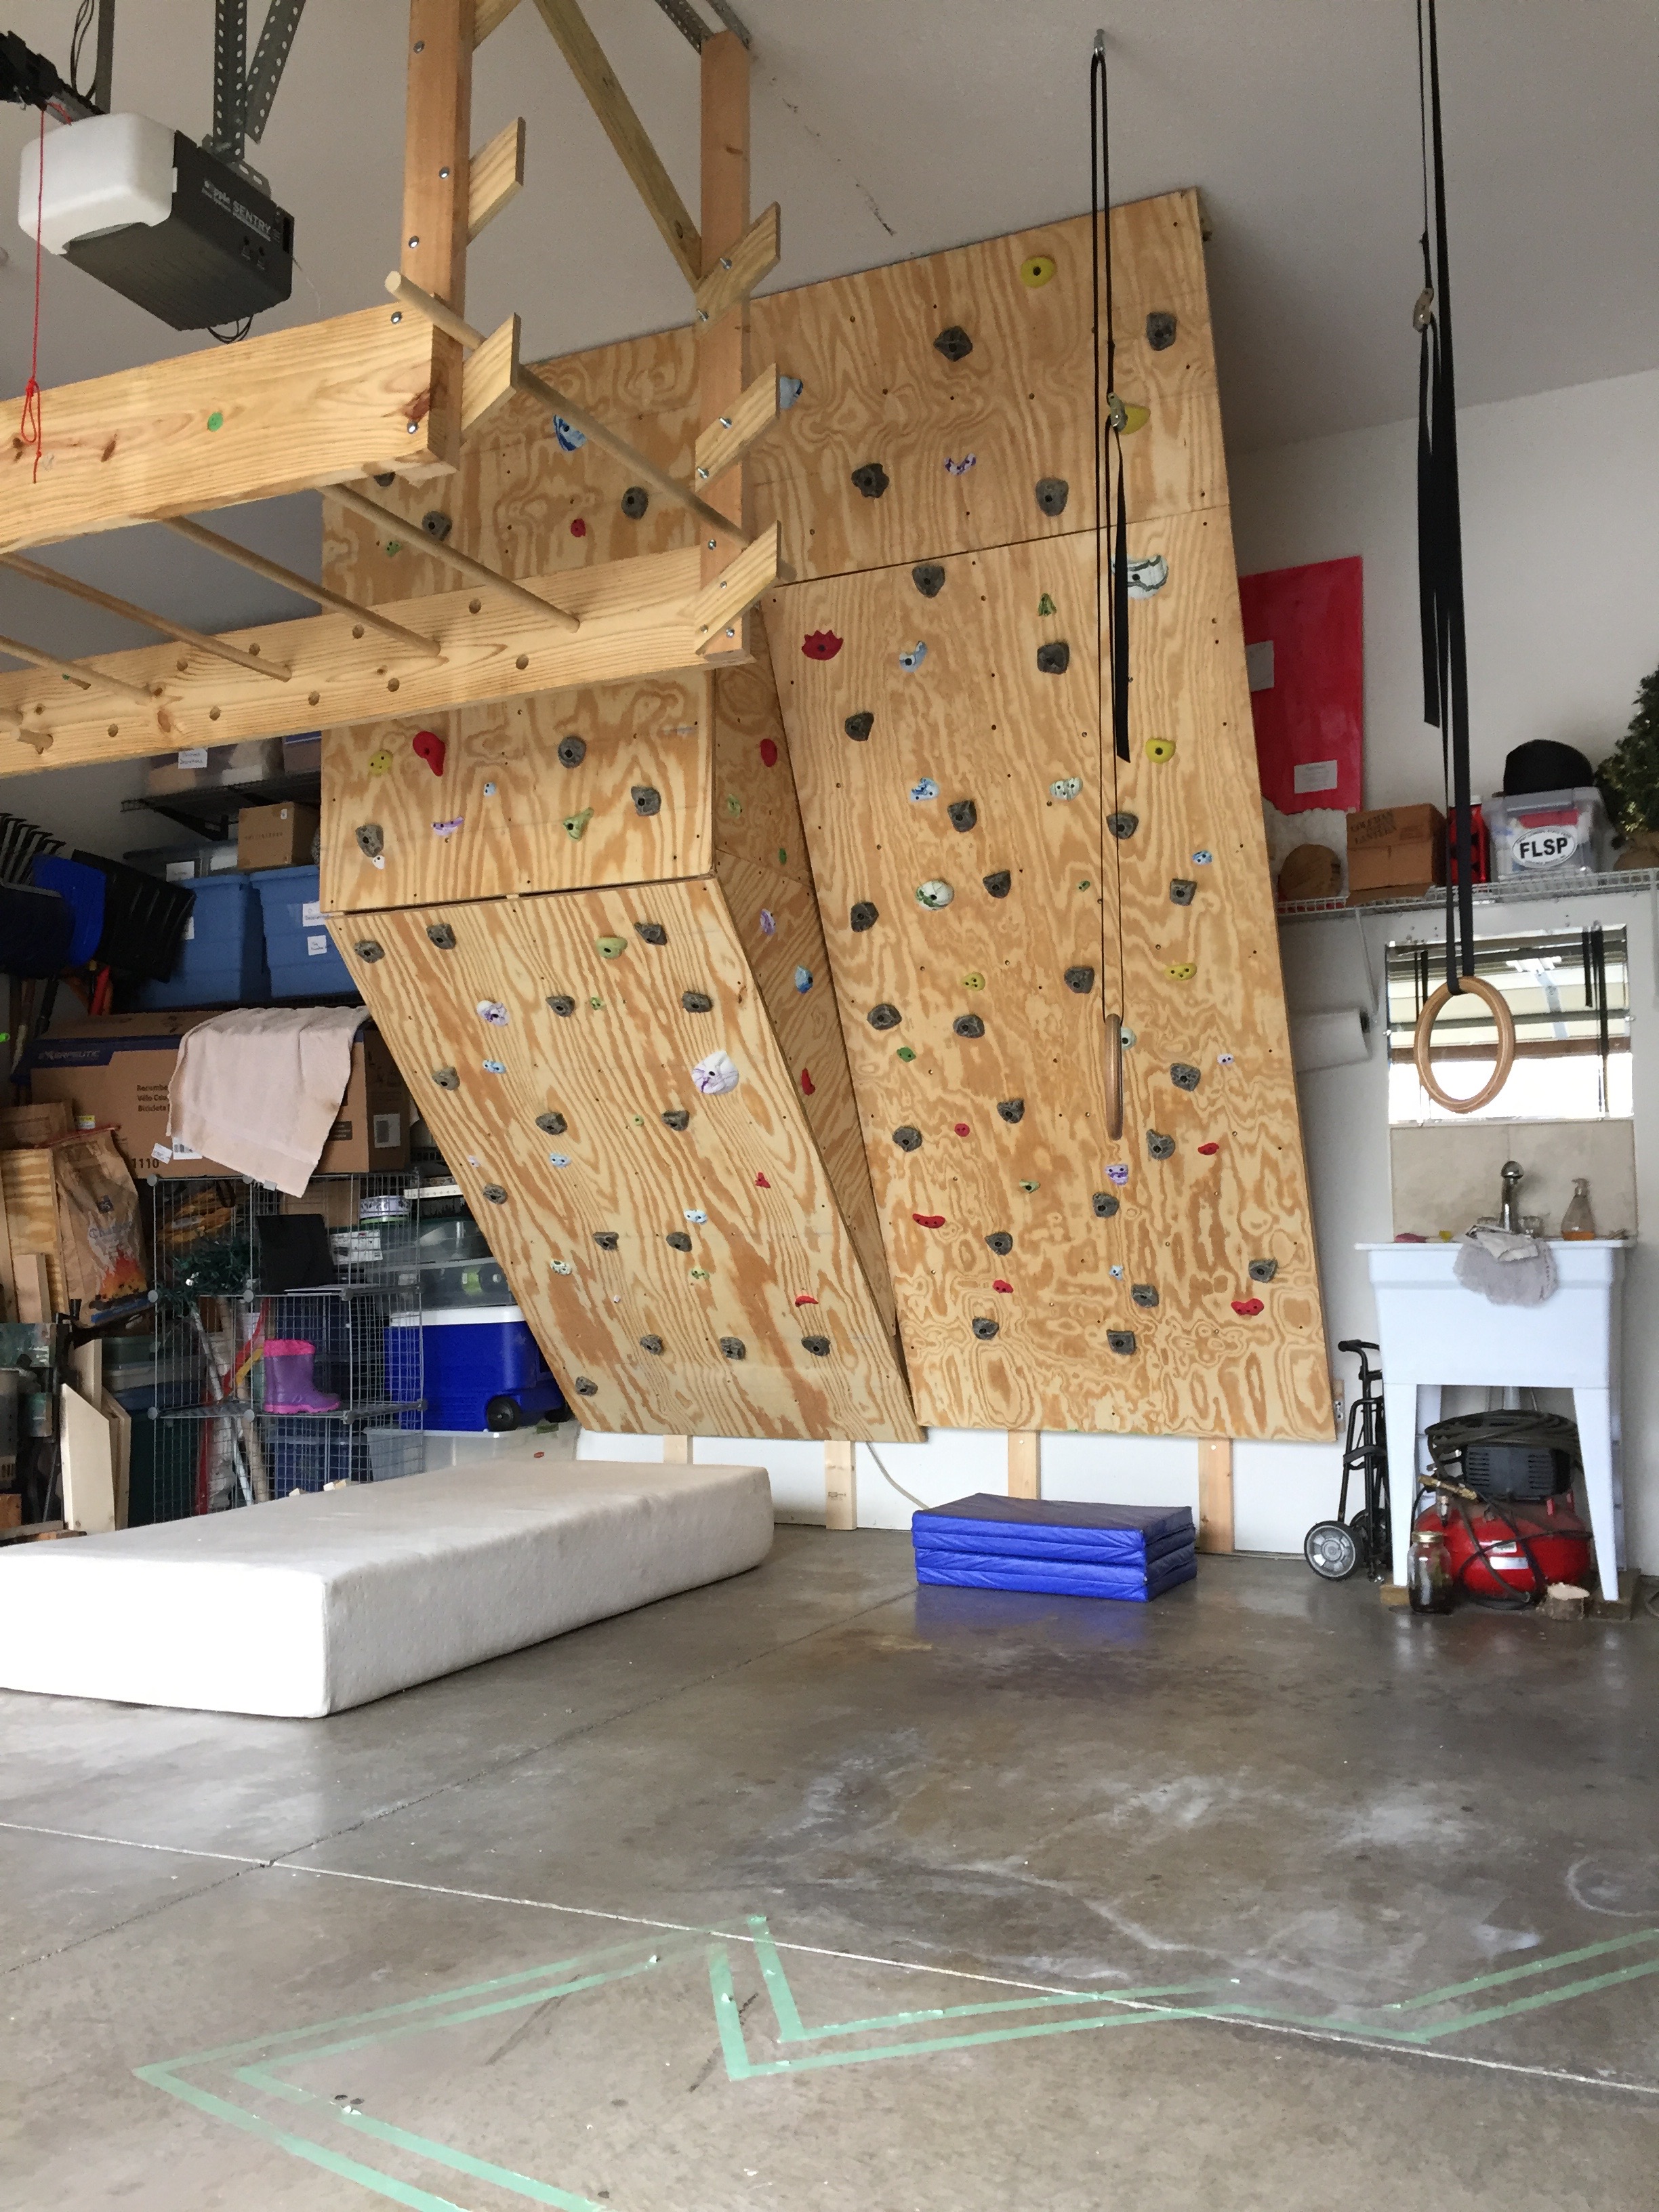
I attached the remaining bolt and screw-on holds and made a couple of important discoveries:
- Some of my bolt holes and t-nuts are covered from behind by joists. This doesn’t work for mounting bolt holds (because the bolt projects through the other side of the board), so those holes are dead.
- Given the angles of the walls and the number of young climbers, we need a lot more mini-jugs and jugs. I bought this Metolius set of 60 holds. The jugs and mini-jugs are great, but it has far more screw-ons, chips, and micros than I need. For this wall set-up, I’d recommend this set of 100. I’m going to order the set of 50 to fill out our walls, along with a lot of extra t-nuts.
I already had a 9 inch foam single mattress that I got on craigslist for $80 – and is a FANTASTIC crash pad, 10x better than a spring mattress. It works well for one face of the wall, but only for climbing on one face. I’m hunting for another single, or for a queen that will (with the single) provide more than adequate crash pad coverage.
Ben reckoned that building his wall took about 3 full days of work. I thought that, with materials in hand, I might be able to finish it in 2 days. In the end it took me about 2 days, plus a number of evenings – coming out to right about Ben’s estimate of 3 days of focused effort.
And now I look forward to I anticipate many, many hours and days of bouldering with my kids.